Wednesday, May 16, 2012

Strawberry Lemonade

Freckled lemonade is one of my biggest weaknesses.
And I have to admit I down the stuff like water.

I've even had a Red Robin waitress in disbelief 
that I needed a fourth refill not very long into my meal!


I especially love it on hot summer days, sitting by the pool.
I can't get enough of the stuff! 


Strawberry Lemonade Recipe

In a two quart pitcher, combine all ingredients:

1 can of frozen lemonade concentrate
Cold water (amount- per can directions)
1- 2 cups strawberries, smashed
1/4 cup of sugar

Stir until sugar dissolves. Refrigerate until well chilled. Enjoy!

-Sylv


Update: Add a zip to this recipe by adding some Fresca, Sprite or Sierra Mist! One part Strawberry Lemonade, one part Soda. :)


        Linked to 733blog.

Tuesday, May 15, 2012

Train

Nevercenter is hosting a sweet giveaway of a Canon 5D MK III digital SLR, valued at $3500.00! To enter, you download a free trial of Camerabag 2.0, and edit a one of your photos in it.

 Here is my entry photo:

"My entry to win a free Canon 5D Mk III via @CameraBag 2 (http://bit.ly/cb2-5d) #cb2giveaway" 


Here is another image I edited using CameraBag 2.0
It is super easy to use, which is a bonus for not- so- computer/program- savvy people like me! 

Here is one more that I edited...

If you are interested in entering, you can here.
Giveaway ends May 22nd, 2012.

Thanks for reading my blog! :)

-Sylvie

Best Super Moist Banana Bread


Whenever I want to score points with my sweetheart, I make banana bread.  We only like our banana bread super moist, and we like it to stay moist for days, rather than getting dried out quickly (but it is usually gone within a day!). 


Here is our favorite recipe, I don't ever use any other! 


Super Moist Banana Bread


Ingredients:


1/2 cup margarine
1 cup sugar
2 eggs
1 tsp vanilla
1/2 cup plain Greek yogurt
2 mashed bananas
1 1/2 cups flour
1 tsp baking soda
1/2 tsp salt


Preheat oven to 350 degrees.  Cream margarine and sugar for 2 minutes. Beat in eggs and vanilla.  Add yogurt and bananas and mix well.  Add remaining ingredients and beat until well mixed.  Spread into a greased and floured bread pan. Bake 60 min. Test with toothpick in the top as you would a cake.  Cool 10 min in pan before turning out. 

This recipe works best with really brown bananas. 
If I have bananas that are getting pretty rotten, and I don't have time to make bread, I just put them into a sandwich bag in the freezer, and thaw them in a bowl on the counter when I need them. 


I originally got this recipe from a cookbook I have called Copper Country Favorites, and I tweaked it a little. 


Enjoy! 


-Sylvie

Monday, May 14, 2012

Ceramic Urn Redo


I found this decorative urn for $1 at a consignment shop.

I didn't love it like it was, so I revamped it...


First, I roughed up the glossy surface with 80 grit sandpaper, 
so that the paint would stick more easily.

I found a simple flower image in google images, and used it as a guide. Using my Xacto knife, I cut the petals out of contact paper and stuck them to the urn where I wanted them. 

Then I sprayed many light coats of Krylon Dual spray paint,
 let it dry, peeled off the contact paper, 
and then hit it with a can of spray gloss.

What do you think? I definitely like it better! :)

-Sylvie

Saturday, May 12, 2012

Game Board- To Mother's Day Card

Super last minute, I made a mother's day card for my mom.

I made it from an old Parcheesi board. 

I folded it and decorated the "front" like a card.


Then on the inside, I wrote in the game spaces.


I wrote things that I love about her, things I am thankful she has done, things I love that we can do together, and things I hope we can do together forever.


It was super fun to make, and I can't wait to give it to her! :)

Happy Mother's Day to all Mamas!

-Sylvie

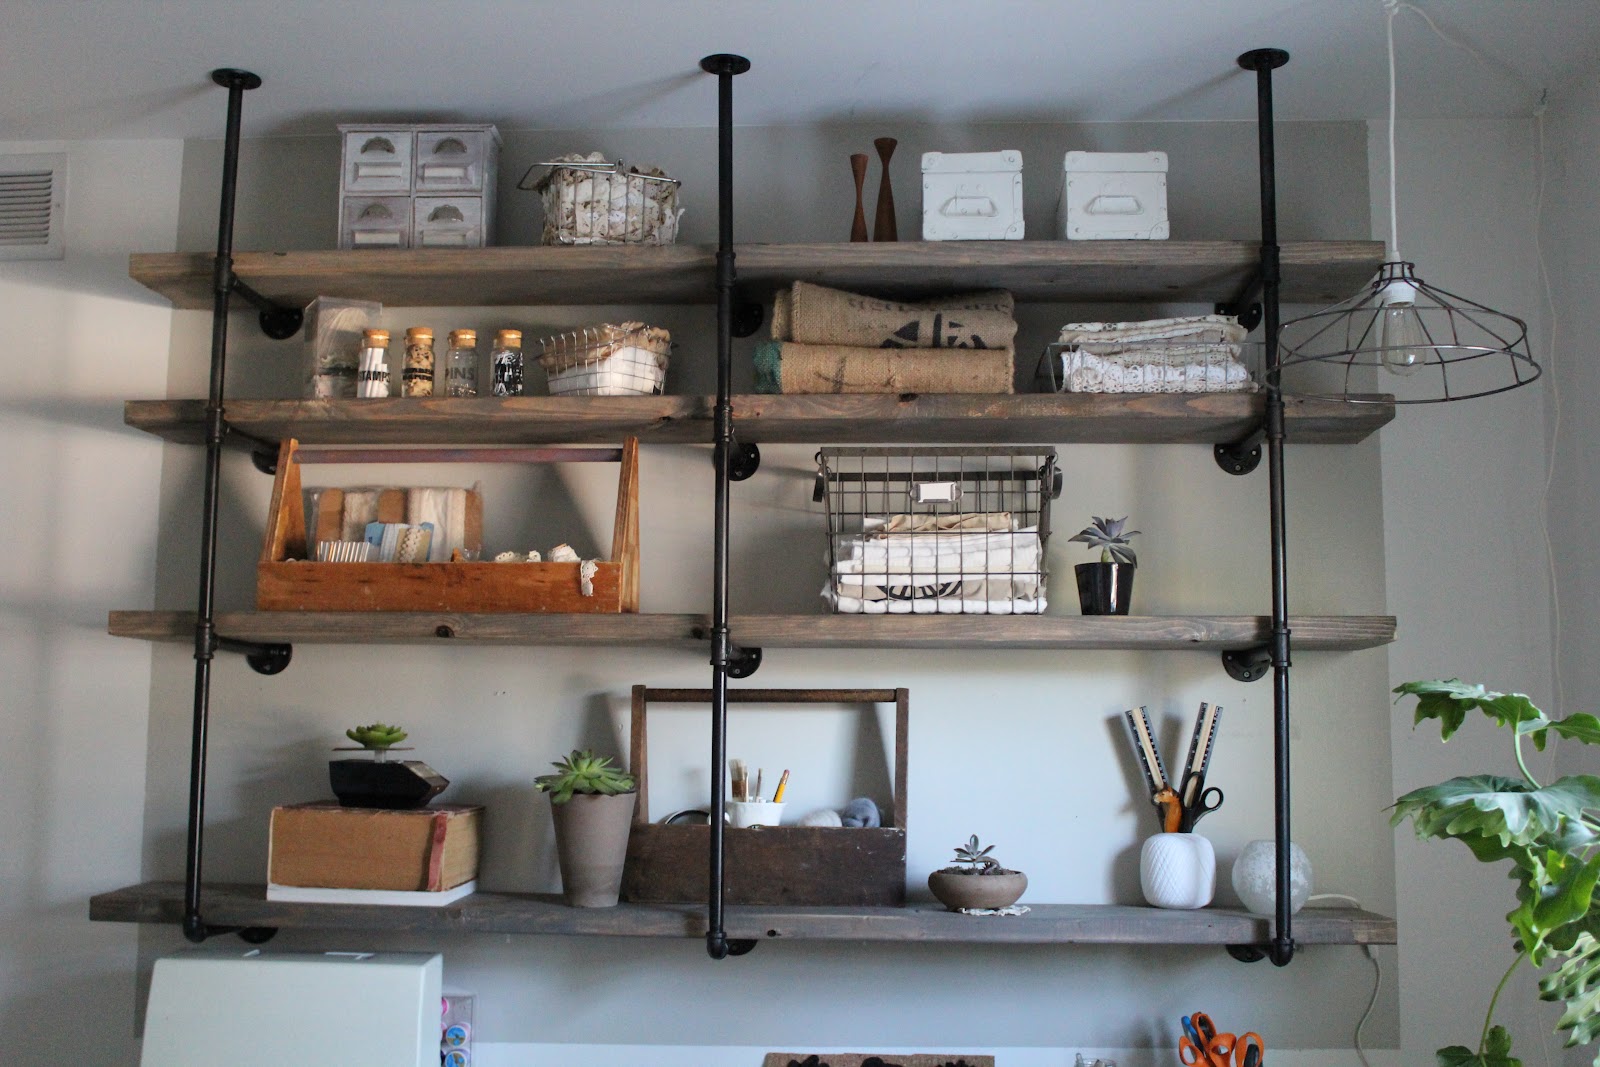
Industrial Rustic Shelf Tutorial

Did you like the shelves in yesterday's post?
Want to make your own?


This is what we did...

Here is our materials list:

I just brought it to The Home Depot 
and had the employees help me find what I needed.
I knew what I needed but hadn't a clue where to find it all!
(Update: For everything on this list, I paid about $200)


You'll need to cut the boards to 6' 6".
I just had the Home Depot guy do it for me!

The wall behind the cupboards we removed was crusty looking, 
so I painted a gray square to go behind the shelves.


Then I lightly smeared the boards with stain,
to make them look aged.


You'll want to wash the pipes and fittings with dish soap.
Once dried, simply screw the pieces together to look like this: 


 Once assembled, give it a light coat of black spray paint to help prevent rust. It is ok if there is some rust started, just spray over it.

Once the paint and stain is dry, 
screw the first two pipe brackets into the wall through the flanges... You'll want to hang them on the studs.


 Once you have the two secured, add the boards.
We added them at this point so that we wouldn't have to fight with the doorway once the third pipe bracket was installed.


 Screw in the final piece, and you're finished! 


 Now have fun adding your favorite pieces from your stash! :)


Happy building! 
If you have any questions, feel free to ask! 

-Sylvie :)


Skip To My Lou   
(Linked to Skip To My Lou and shwinandshwin)

Friday, May 11, 2012

Before & After: Craft Room

On Monday, I read Mandi's room redo challenge over at Vintage Revivals, and it inspired me to finally tackle my messy craft room!

Here is a (humiliating) before pic...
Eep! I'm blushing... I know, I know, its horrid!
This room makeover was LONG overdue! 

So, with some help from my sis and my hubby,
The room was transformed in a couple days! 


 Much better don't you think?!


I am more than pleased with this space now!
And what is sweet is that other than the shelves,
I only used things I had in the heap already! 
I hauled piles of stuff to goodwill and to the curb.

Doesn't it make you want to 
sit down and create something beautiful?!

I am super geeked about the new shelves and guess what!
WE MADE THEM! 

Now I totally having this little feeling that 
I can create anything in my home that I dream up! :)

Be sure to check in tomorrow for a tutorial on how to make your own industrial/ rustic shelves! Really, it was super easy!

(*Update: You can find the full tutorial here.*)

Have a good weekend!
Thanks for reading my blog!

-Sylv :)


Funky Junk Interiors

Monday, May 7, 2012

Grand Rapids Part II

We stayed at the JW Marriot,

way up on the 21st floor.


Our room overlooked the river.


The views from up there were so neat! :)


The kids loved that they could see the carousel they rode earlier.


We enjoyed playing with our camera to get sweet shots.


It was lovely to have Starbucks just downstairs!


We walked to Friday's for dinner, yumm!


We relaxed in the pool, hot tub, and steam room.

Saturday morning, we chilled in our room, watching the city.


And then went to Marie Catrib's for lunch.


They are so pleasant there! 
(And the food is delicious)


I had to remember to put my camera down and enjoy the city through my own eyes rather than the camera lens! :)


After lunch, we went to the Grand Rapids Children's Museum.


The kids loved it. The light table was one of their favorites! 


We had such a nice time together. 

My hubby held up ok through it all, but was so sore the morning after we got home.  He still needs strong pain meds a lot of the time. He saw the doctor today, and he will be seeing a neurologist to do nerve testing, as well as an orthopedic surgeon to see if he'll need surgery on the one collar bone that isn't going back in place. He won't be going back to work for at least 3 more weeks. 

He amazes me with how positive and patient he is through it all. I am so thankful that he is this way, I find myself impatiently wishing for some normalcy again in our lives! 

Thanks for reading! 

-Sylv