Tuesday, April 16, 2013

Woman's Cardigan to Girl's Cardigan Dress Tutorial

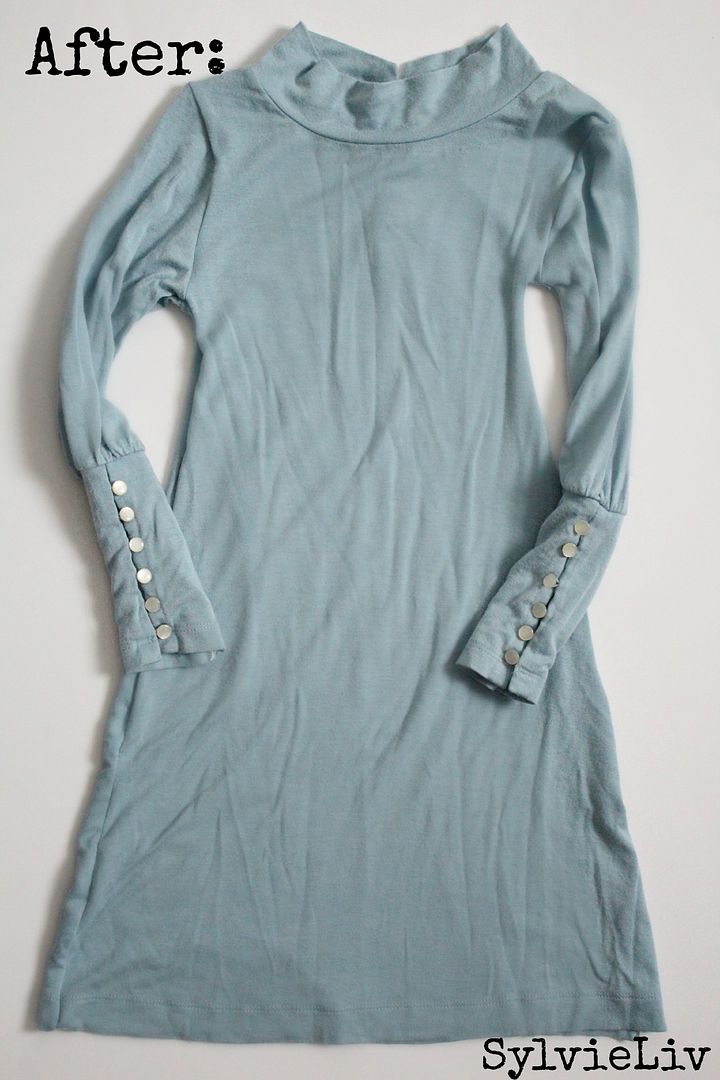
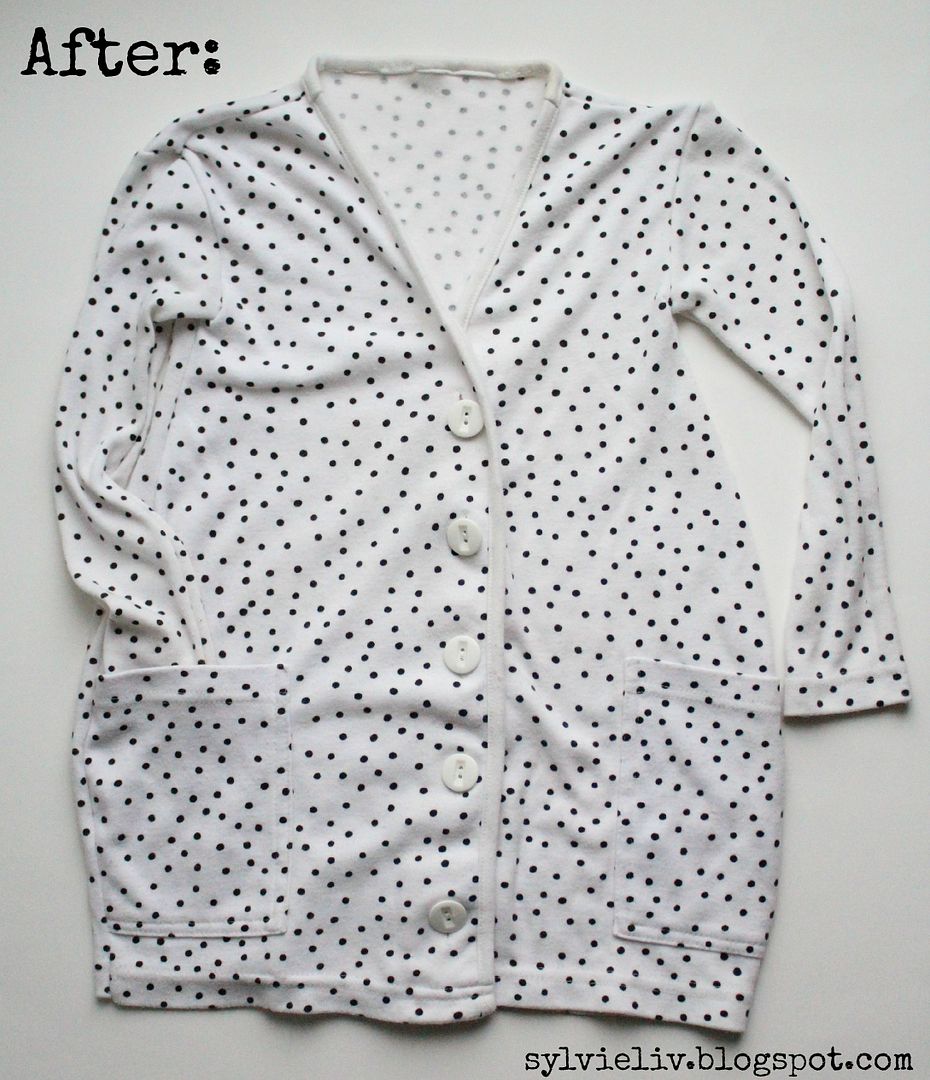
This was one of the most fun projects I have ever done!
Another dirt cheap thrift store find, turned into one of my favorite pieces for one of the little Livs! :) 

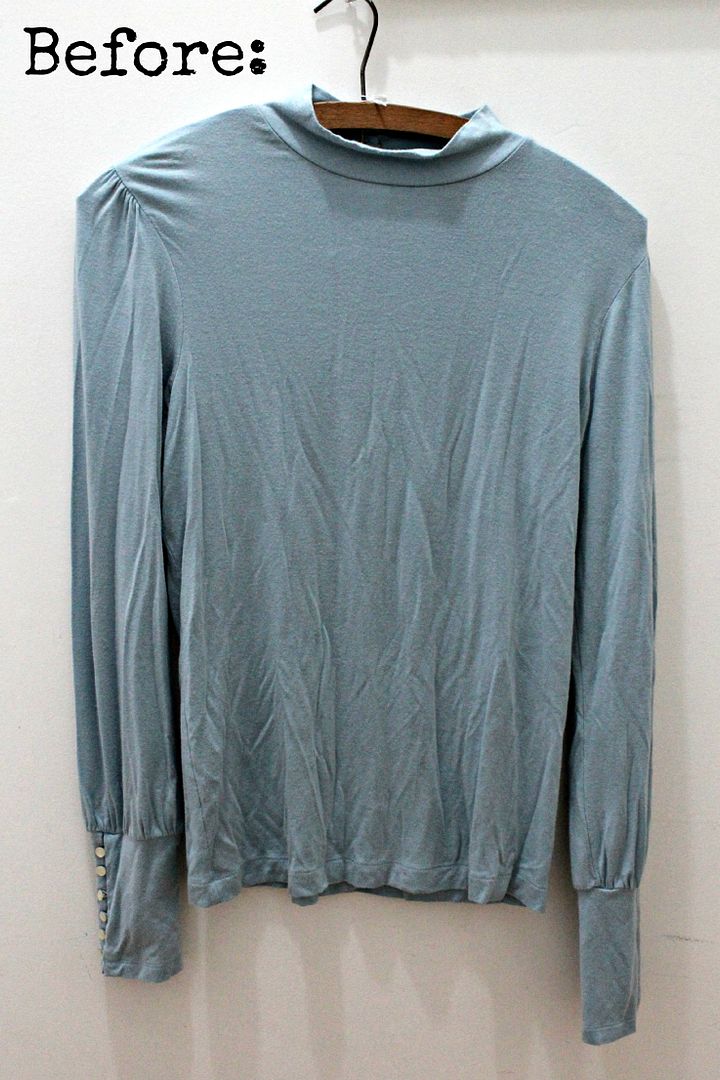
Do you have am old cardigan in your closet, collecting dust?
Haul it out and get out your scissors!
(Sorry some of the pics are crusty, I made it on the coffee table in the middle of the night while visiting w Mr. Liv!)

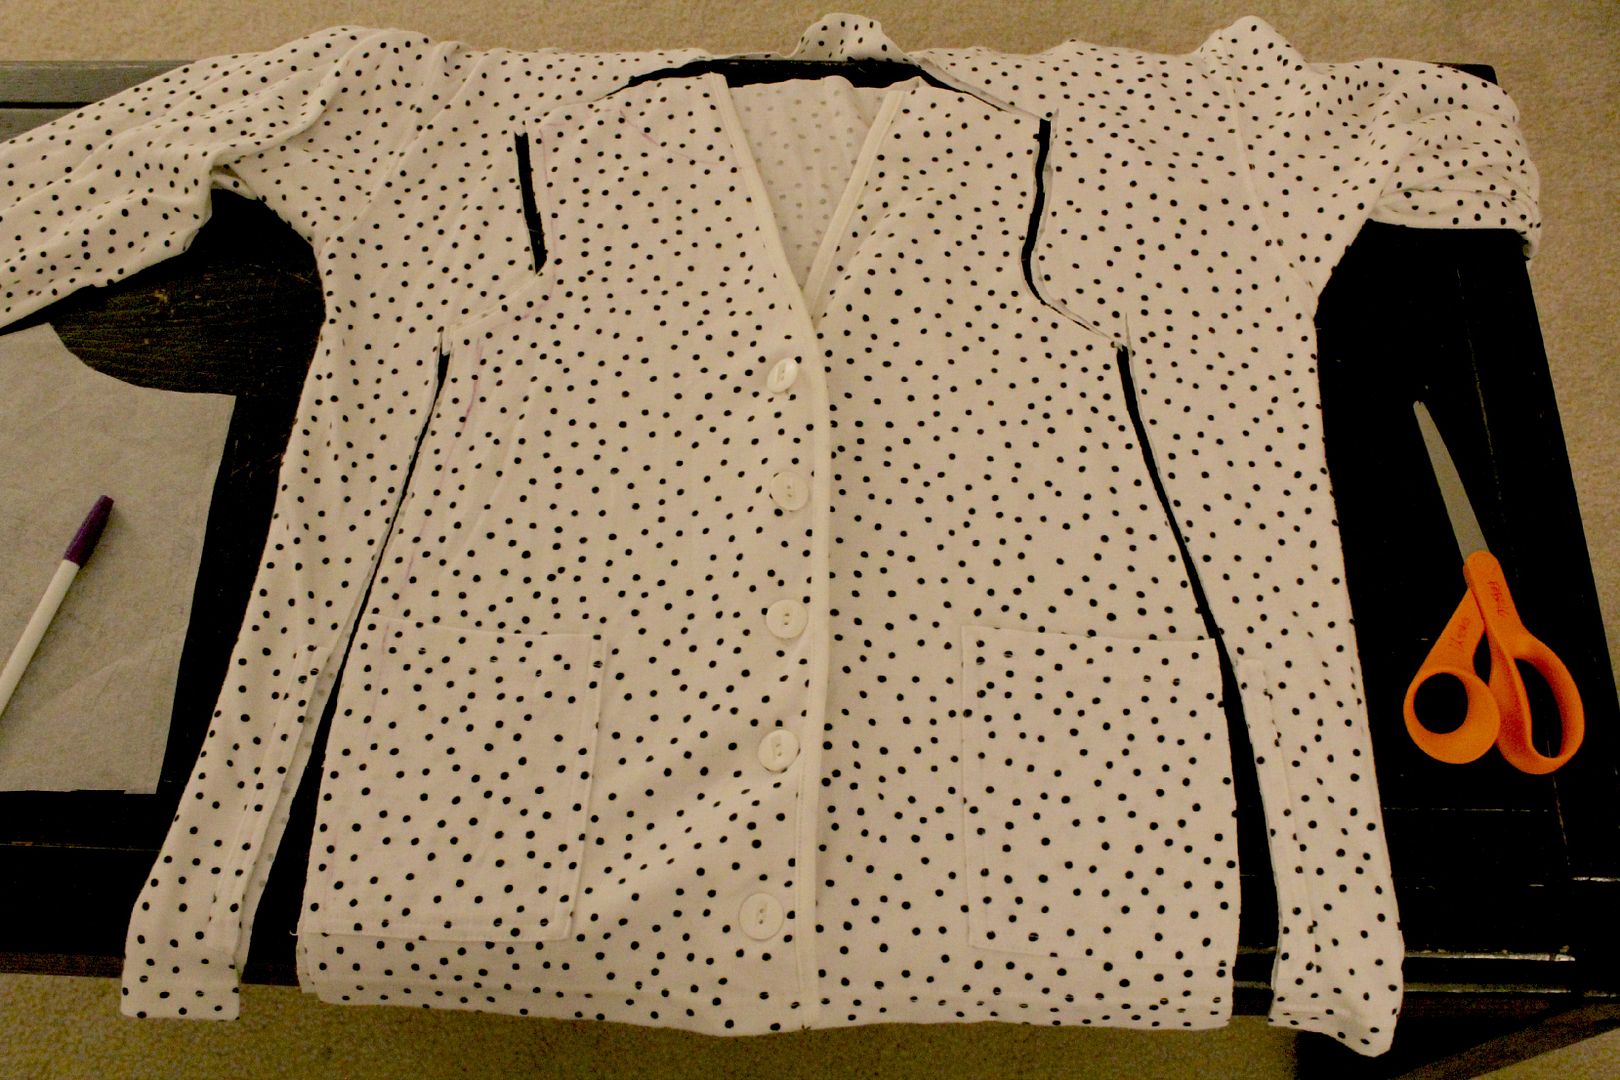
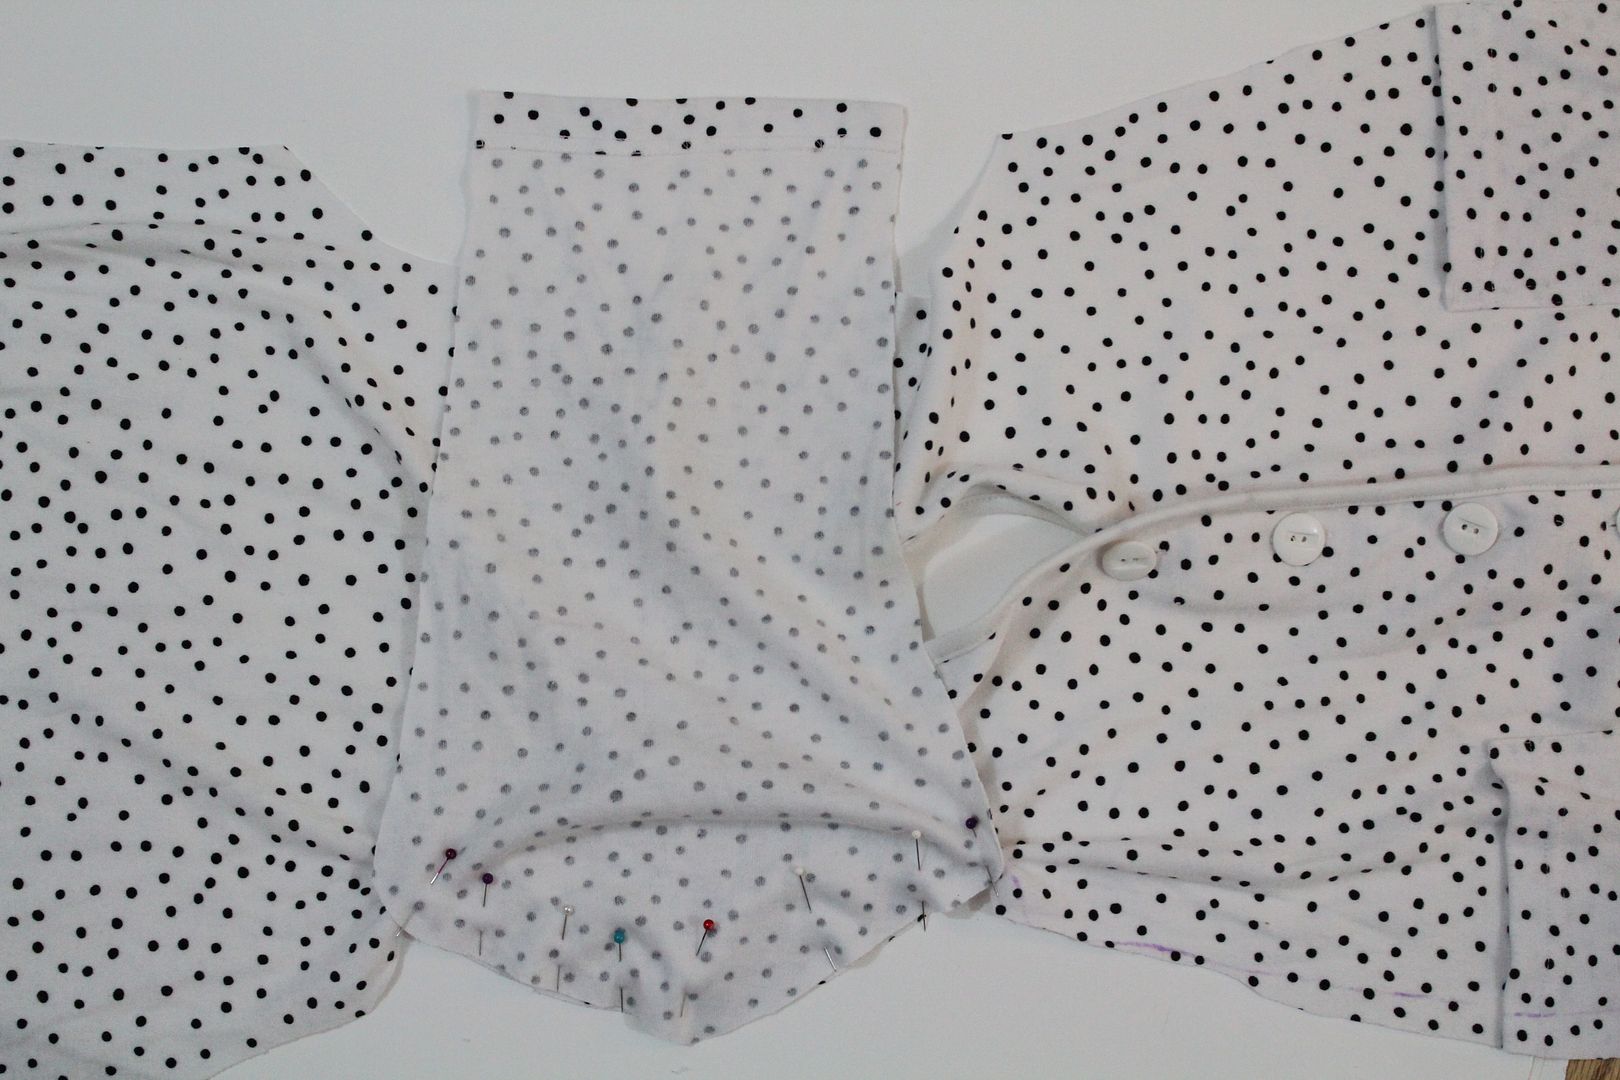
First, lay out your cardigan. Using a fabric marker, trace a bodice pattern (I used the bodice from Color Block Dress from Shwin&Shwin) right near the top of the buttons in the front. Continue the side seam line down to the bottom of the shirt (you could also just use a dress or shirt you already have to trace).
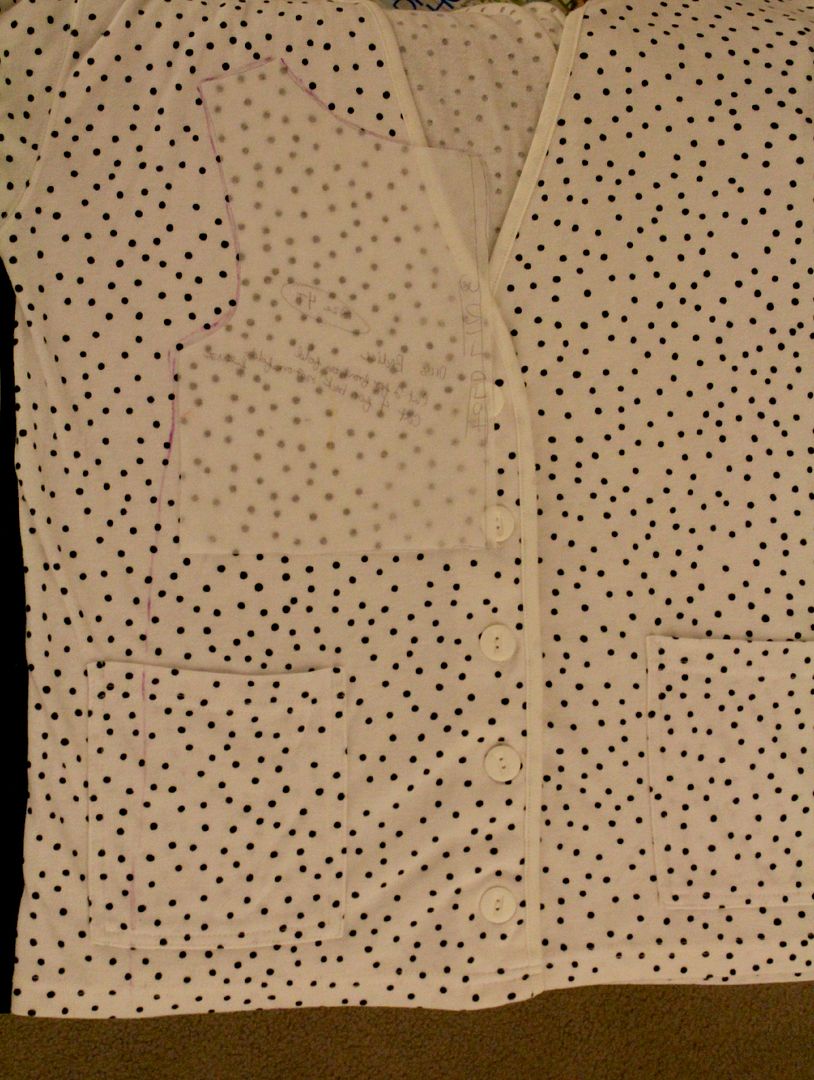
Cut the shirt along your line, but give yourself a seam allowance as well.
If you want the back of the cardigan to be high, cut straight across the top from the shoulder, rather than following the neck line.
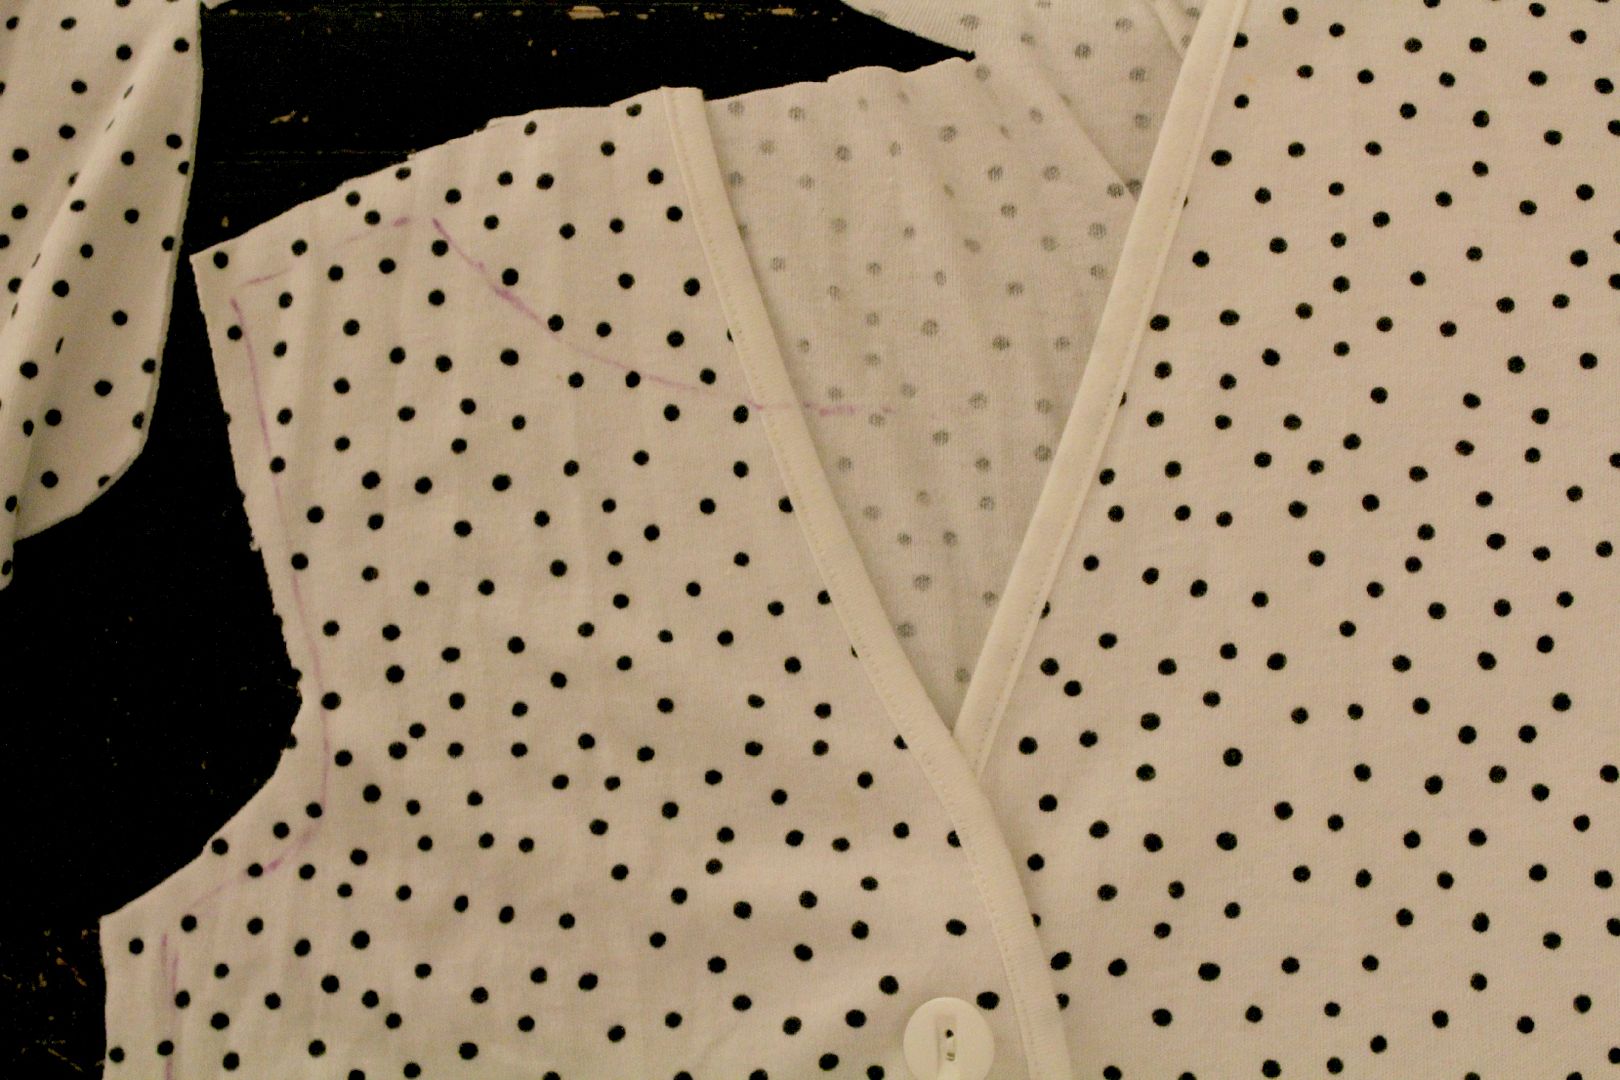
Fold the cut side inward, and trace it on the opposite side.
It should look like this now:
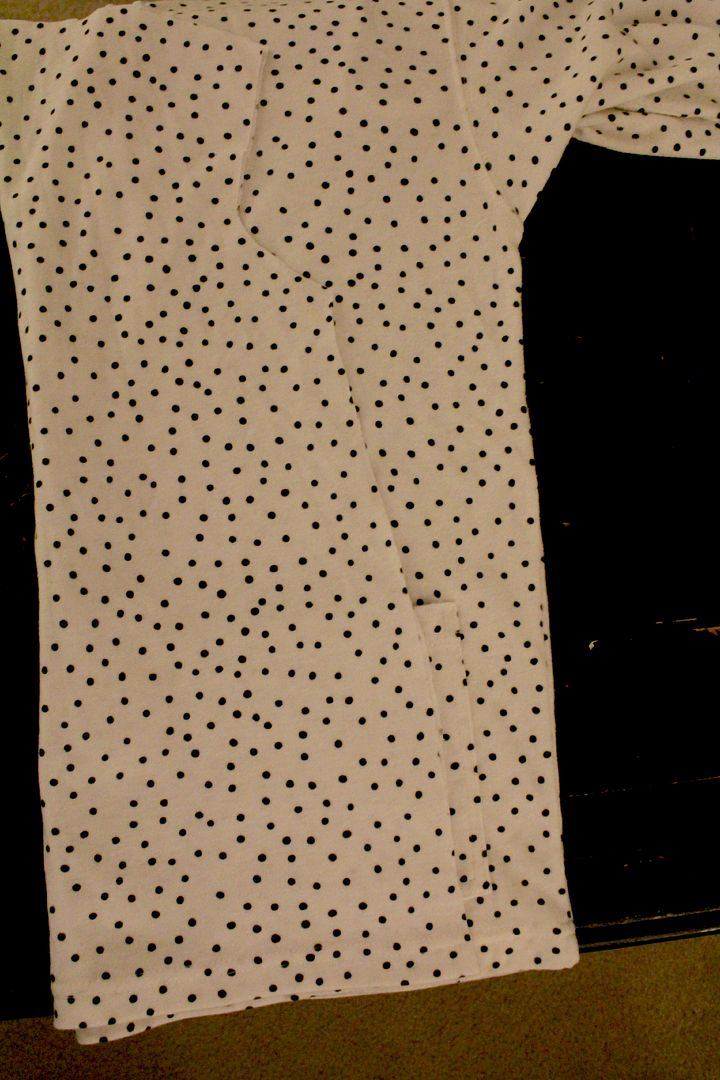
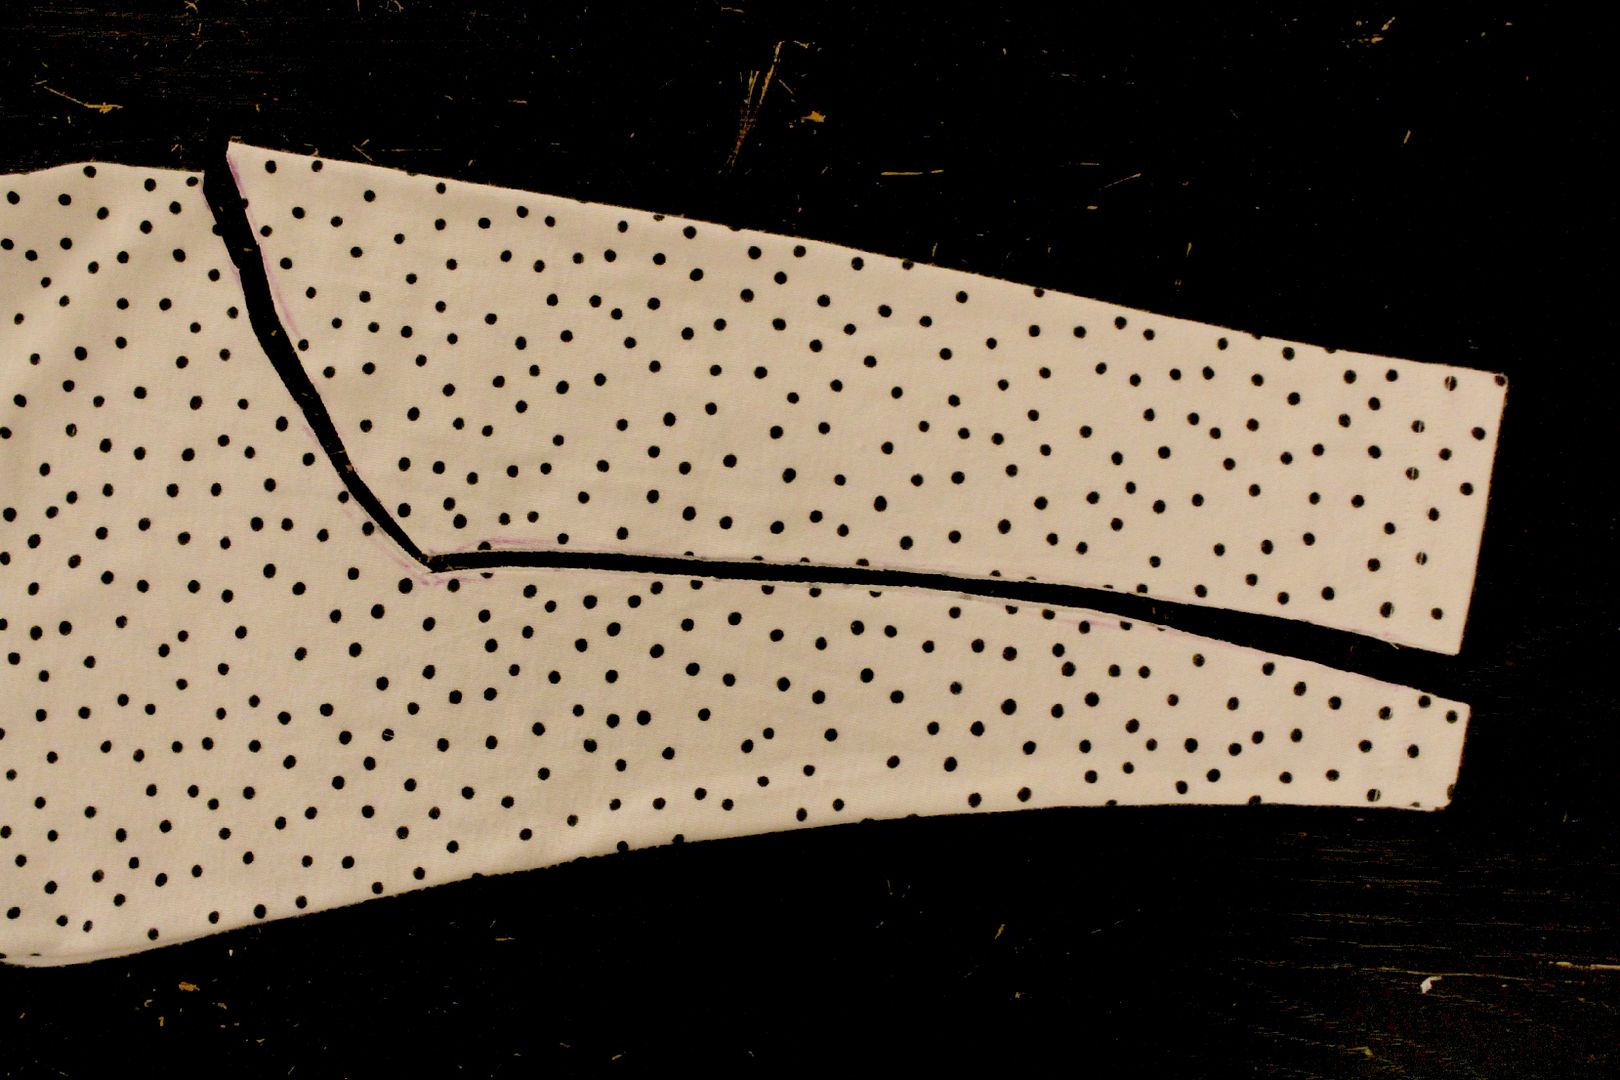
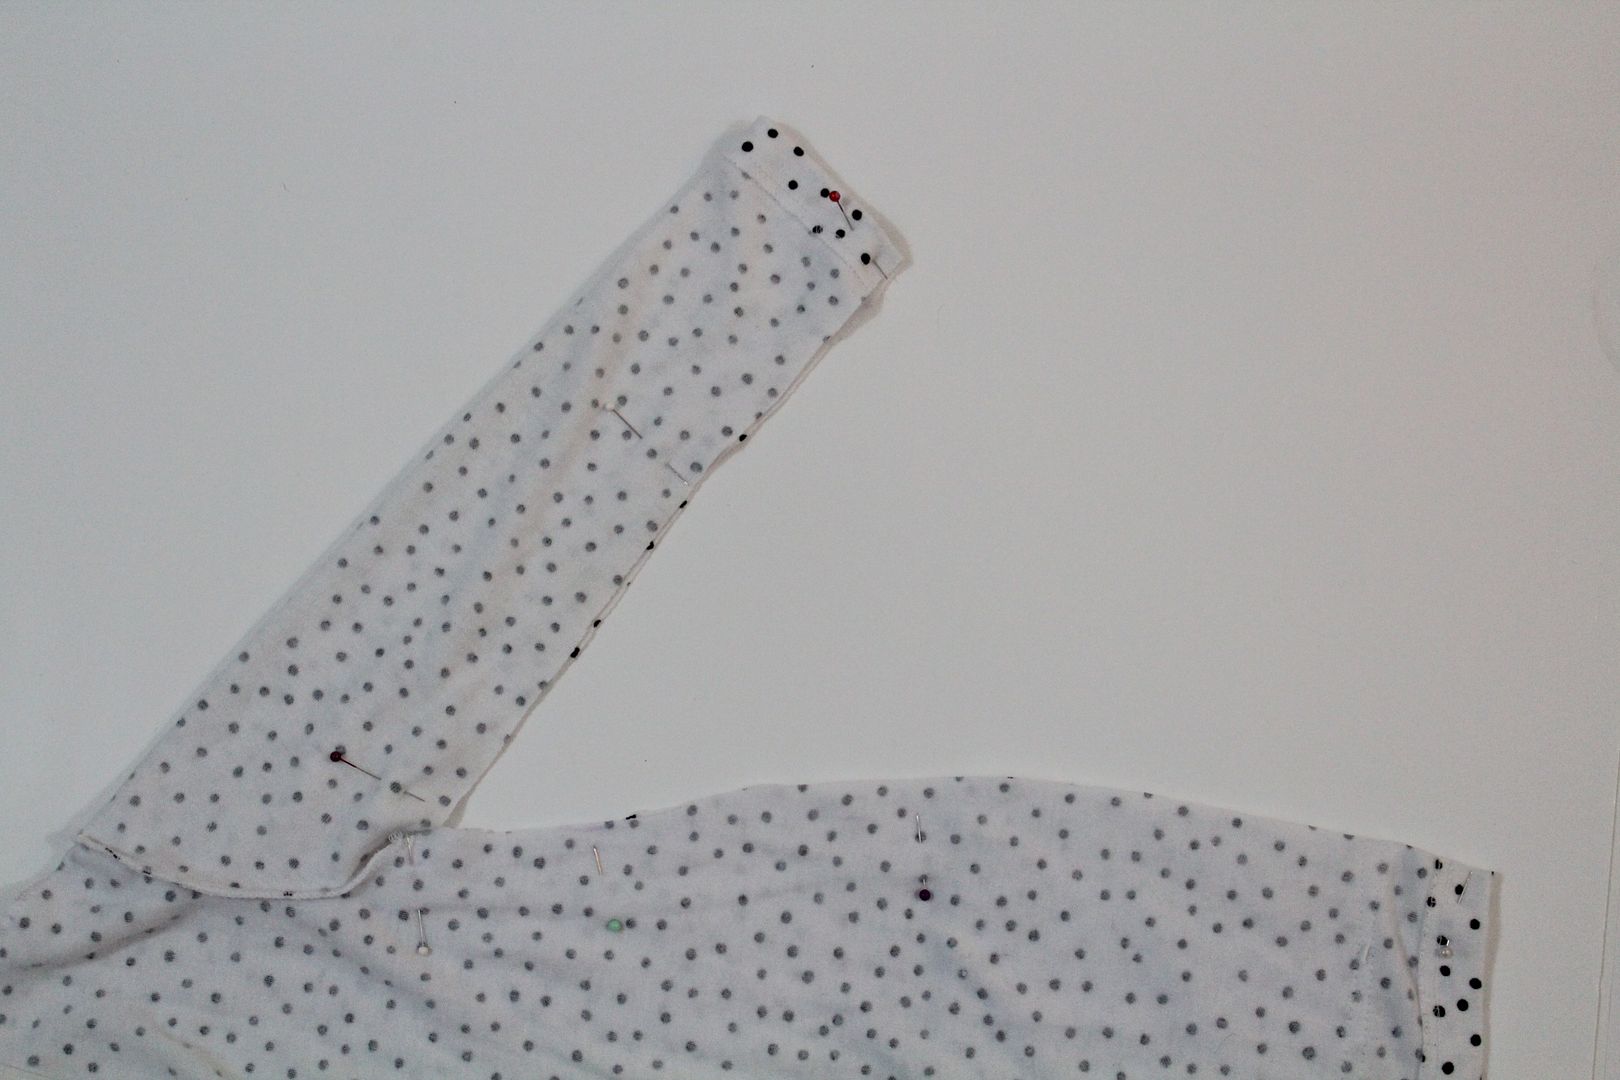
Using a sleeve of a shirt that fits your girl well, trace a sleeve onto the end of the cardigan sleeve. 
You want the ends to line up so you can use the existing hem.
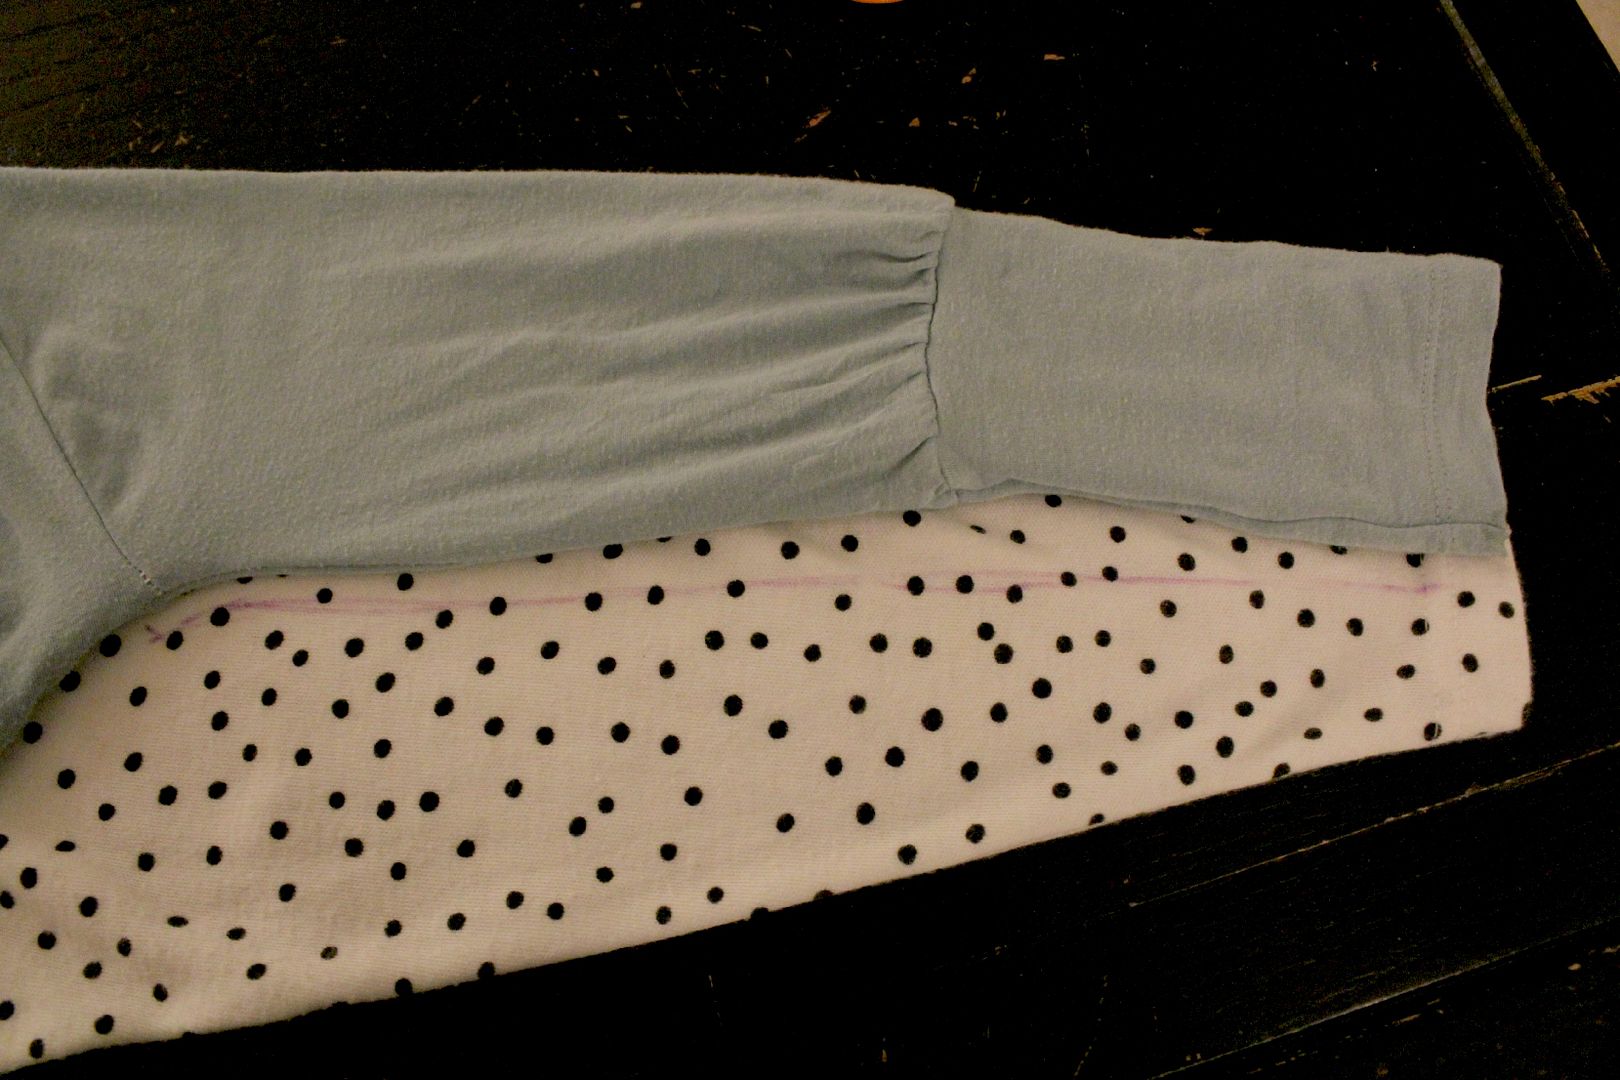
Don't forget your seam allowance! Cut the sleeve, and repeat on the other sleeve.
Put your bodice pieces right sides together, pin along the shoulders, and sew/ serge the shoulders together.
Open up the bodice pieces, and pin the shoulder of the sleeve to the shoulder of the bodice, right sides together. Sew along the pins. Repeat with other sleeve.
Fold it together inside out, and pin along the length to the sleeve and the side of the bodice. Sew/ serge it together.
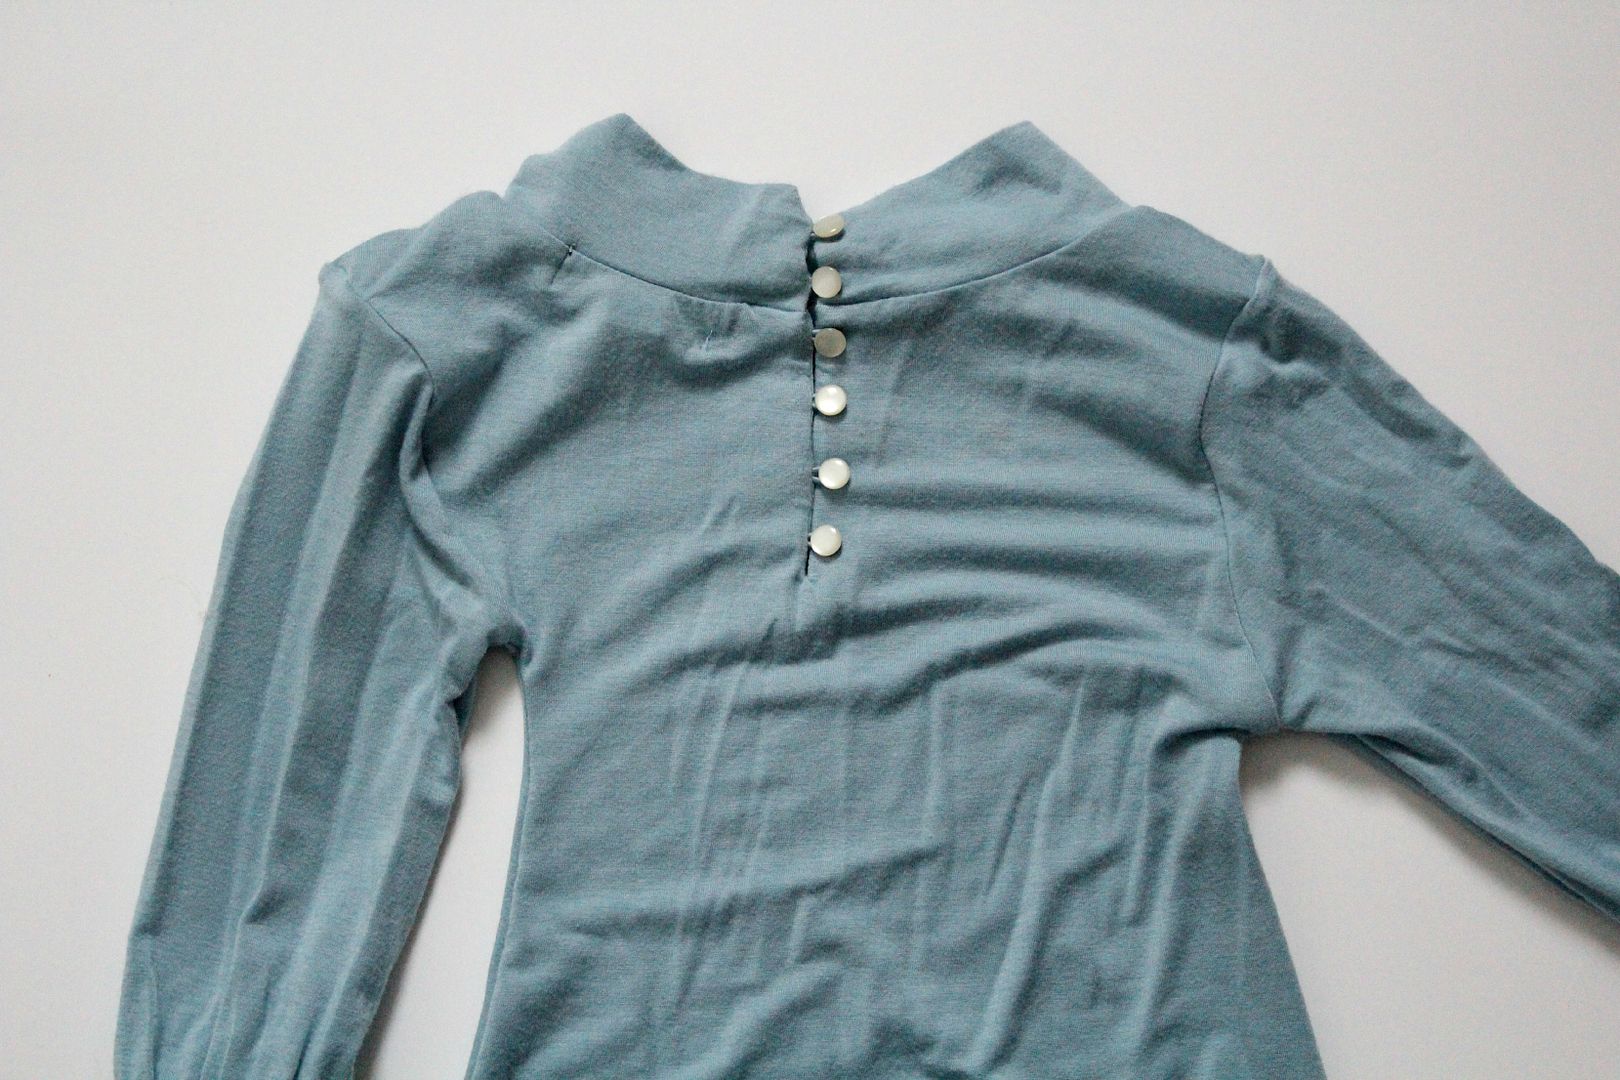
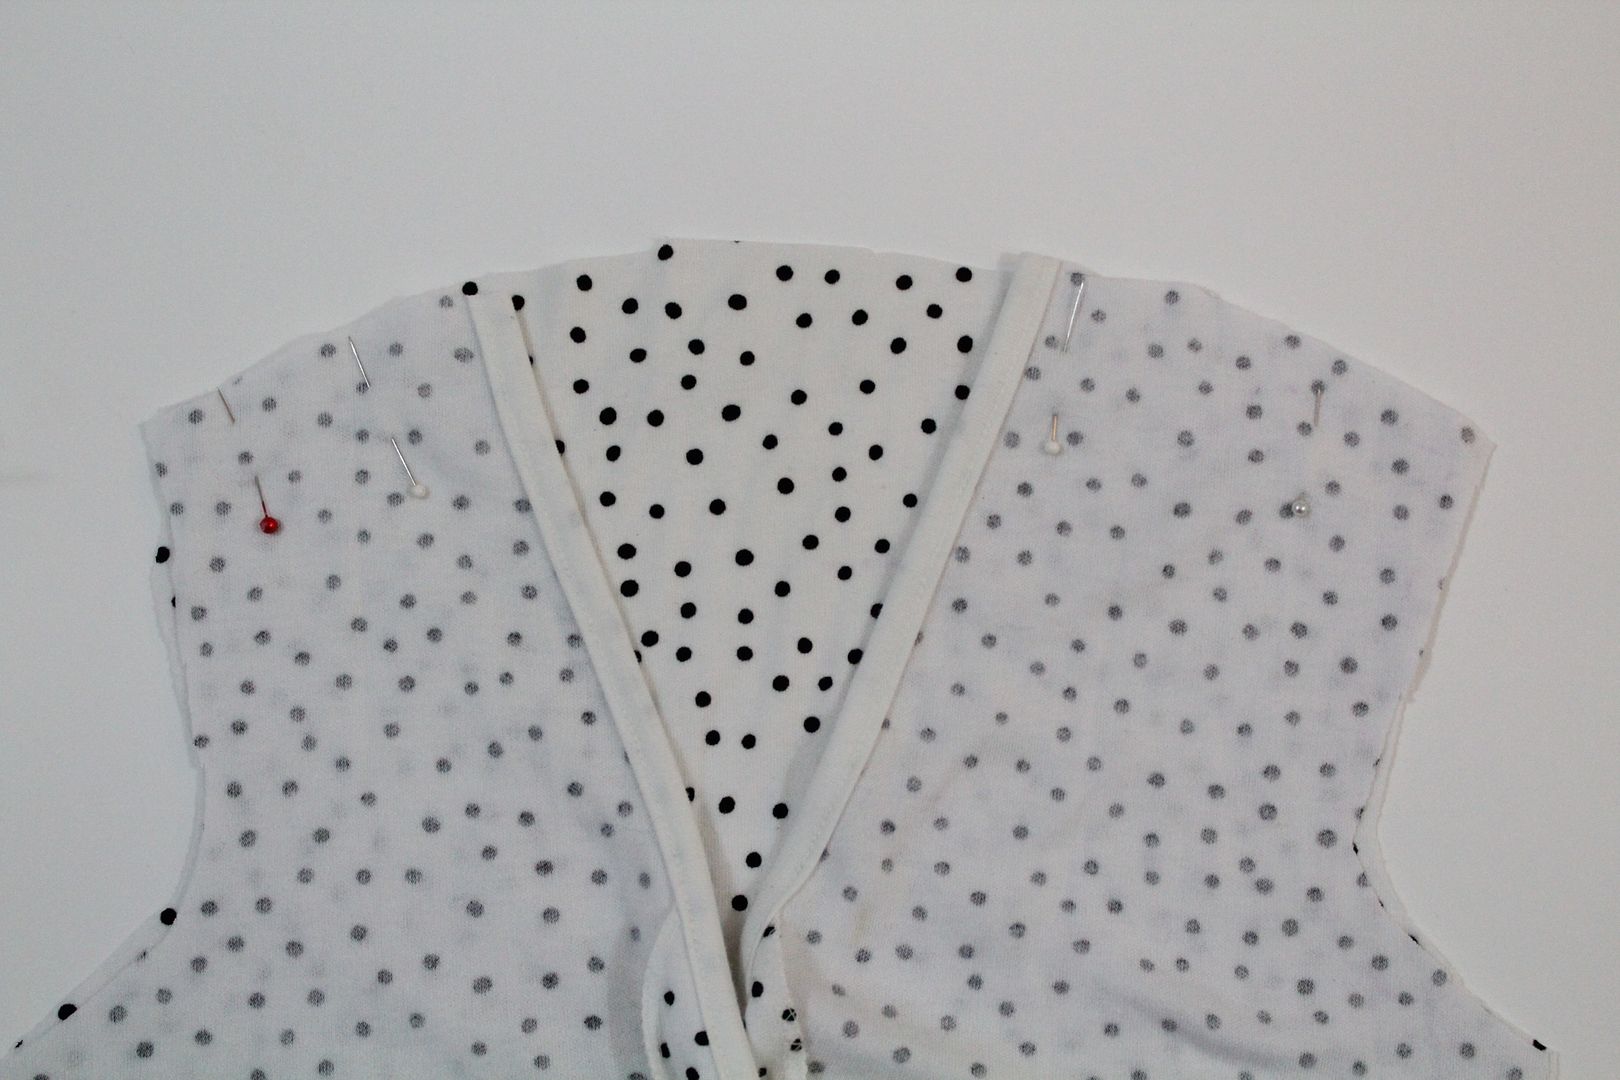
Using the leftover scraps of cardigan, pick out the stitches on the bias tape to remove a piece of bias tape for the back of the neck.
Sew the bias tape to the back of the neck on the new shirt.
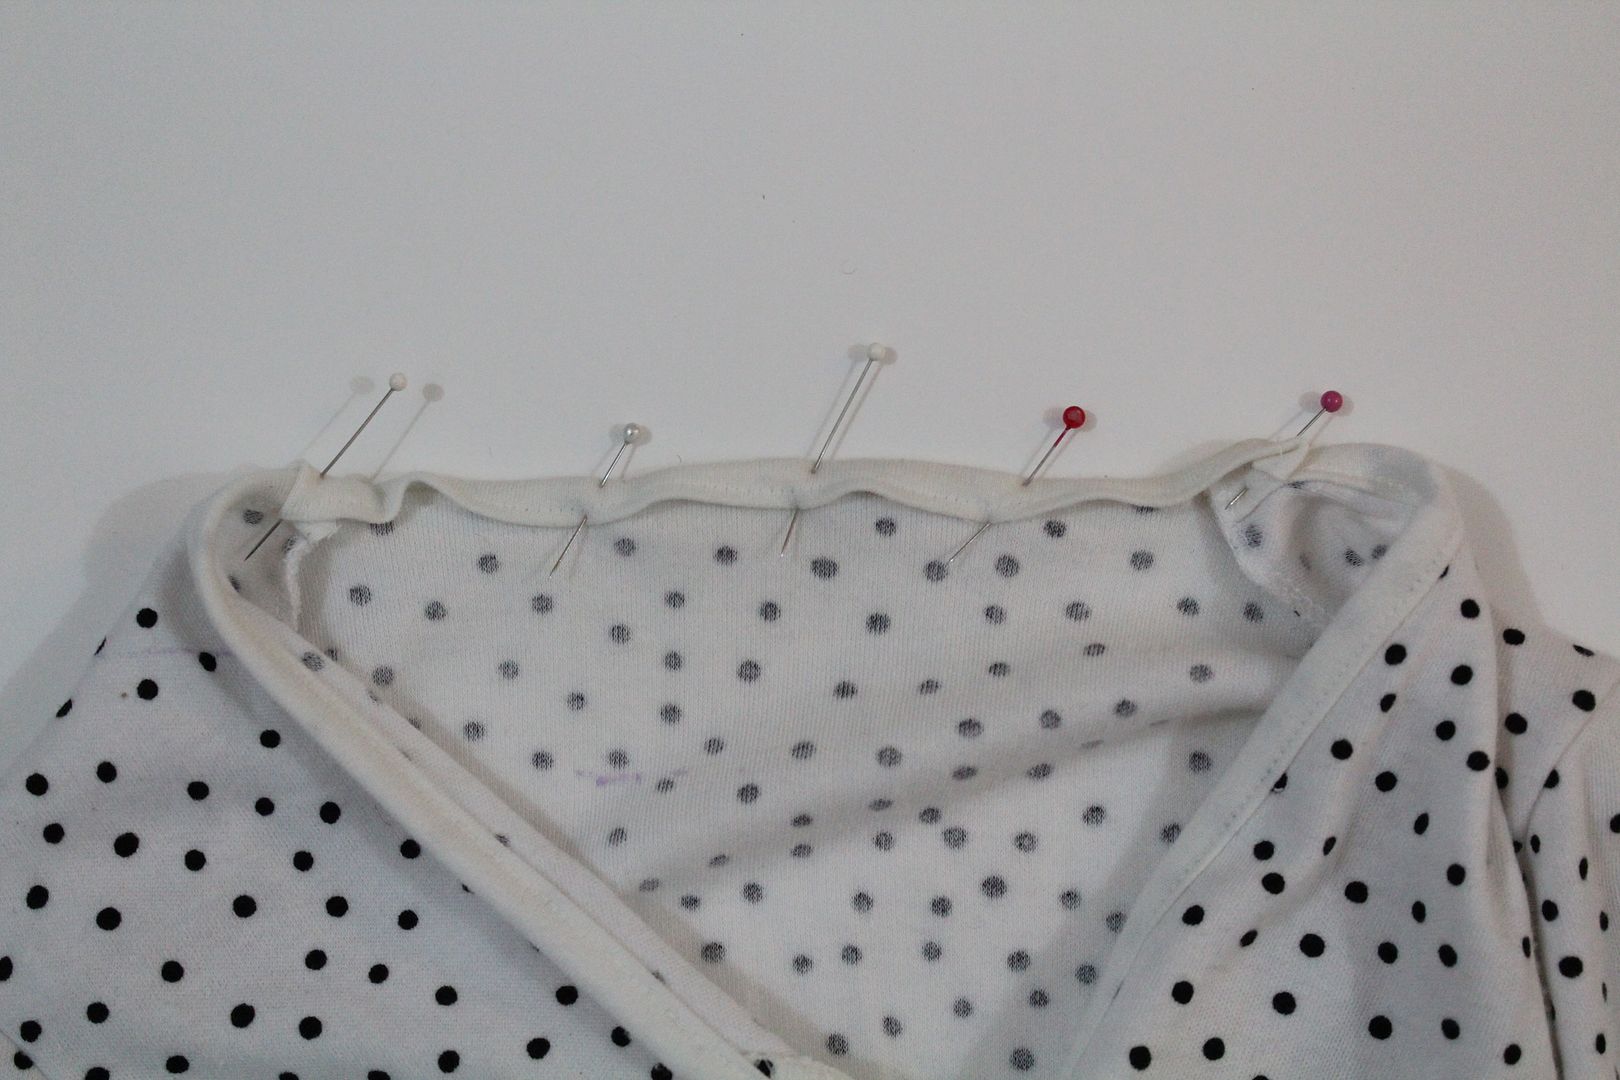
If you are unsure of how to attach a knit binding, there is a nice tutorial here at ikat bag!

That's all! :) This project took me about 1.5 hours- totally doable after the little's bedtime!
Have fun! 

Thanks for reading!
Sylvie

Thursday, April 11, 2013

One Year Later, Looking Back...

One year ago today, my dear husband had a near death experience in an accident at work.
Looking back, I wouldn't change the past.  We both grew so much from that experience. It was a reminder that each moment that I have him with me is a gift. 
It was also a reminder that our lives are not in our own hands, 
but they are in God's. Before that day, I was feeling pretty in control. I felt like I could handle my life so well. I could decide how things would go. I was clearly shown otherwise.
One thing that hasn't changed though, is that Mr. Liv is still prone to accidents. In the last year, he has bruised, bumped, and gouged himself many times, sometimes deep enough to need stitches... 
Do you think it has anything to do with him always testing the limits!? ;)

Another thing that hasn't changed is the feeling I had immediately after the accident. 
Here is what I wrote: 

"I love this man. I need this man. I feel like he is part of me. Our children love him and need him. I feel like I cannot thank God enough for preserving his life a while longer."  


You can read the full accident story here.

Today I'll hug my loved ones a little closer, 
and feel thankful for our health.
-Sylvie

Tuesday, April 9, 2013

Yellow Wire Pendant Lamp

Here is a lil something we have been up to over here!
Mr. Liv made this custom lamp for a customer for her little girls room.
Isn't it lovely! :) I think I'd like one in yellow myself!

Enjoy your week! :)
Sylvie

Wednesday, April 3, 2013

Come Spring

Suddenly the thought of bugs on the porch is appealing.
Red Poppies Original Watercolor / Original Art direct from the Artist / Flowers
Little sprouts in the garden bring dreams of fluttering petals to come.
Whitney Trousers & Skirt PDF Pattern and Tutorial, All sizes 2- 10 years included
The dark heavy clothes are finding a new place behind the fresh bright new favorites.
And the soup recipes are pushes aside to make room for cold drinks and ice cream.

Sigh. Spring is so happy.

I hope your day is full of sunshine! :)
Sylvie

Monday, April 1, 2013

Woman's Shirt To Girls Dress Upcycle

It is therapy to me to make clothes that I love for my littles that cost nothing.
My sister gave me this shirt, and in 15 minutes, I had it cut up and turned into a lil dress!! 
Yep, I'm serious, 15 min. Mr. Lovely Liv bought me a serger for Christmas, 
so it made the process WAY faster and easier!!
I made it the using this simple tutorial, without adding the ruffle to the bottom.
I simple used the existing bottom shirt hem for the bottom dress hem. 

:) I literally would rather have a fun, cute, and FREE project like this turn out than go get a Starbuck's! It makes me happy to make something from "nothing!" :)

Thanks sis, for the shirt!!

Have a good week!
Sylvie