Friday, June 29, 2012

My First Attempt at Making French Macarons...

I think they are beautiful.
I tackled something totally new and different for me...

I made these for a little ladies night I had recently.  

They where super good!
 I definitely will be making them again! 
Instead of making Swiss Meringue Buttercream Frosting
that is supposed to go in them, I just used a jar of cheap frosting
from the store... I really like them that way!

Try them out! They are fun and different than the usual chocolate chip cookie!

-Sylv

New Purse In The Shop!

Today we have a new purse in the shop! 
This one is a new version of the purse I have previously made
as a laptop bag, and as a little girls purse! 
Come check it out in our shop!


Wednesday, June 27, 2012

Best Guacamole Recipe Ever!

My super sweet aunt who lives across the country was here
recently, and made the yummiest guacamole ever! 


Really! I can't stop scarfing this stuff! 

Best Guacamole Recipe

2 Ripe Avocados
1 Pkg Guacamole Seasoning
1 Med Tomato, diced
A Handful of Fresh Cilantro, chopped
1 1/2 cups Large Curd Cottage Cheese
Salt & Pepper to taste

*Avocados are ripe when they give slightly when squeezed.
If they feel hard, they are not ripe.
If they are soft and dent easily, they are overripe!

Directions

Scrape out the insides of your avocado, smash in a bowl,
and mix in the rest of the ingredients.

Enjoy on tortilla chips, fresh bread cut small, in burritos, or dip tacos or quesadillas in it! 
This stuff is so good you'll be addicted 
immedietly! 

Enjoy! :)

-Sylvie


Tuesday, June 26, 2012

Summer Skirt Redo

"I'm just gonna shock the pool real quick", turns into a bigger job
when you splash chlorine on your new summer skirt!

I love lil cotton skirts for throwing on over my swimsuit 
when the surprise company rolls in. Really, we never know 
how many people we'll have over each evening! I love that
everyone is comfy to come here, but I have to be prepared
with handy clothes to cover up when evening comes! :)

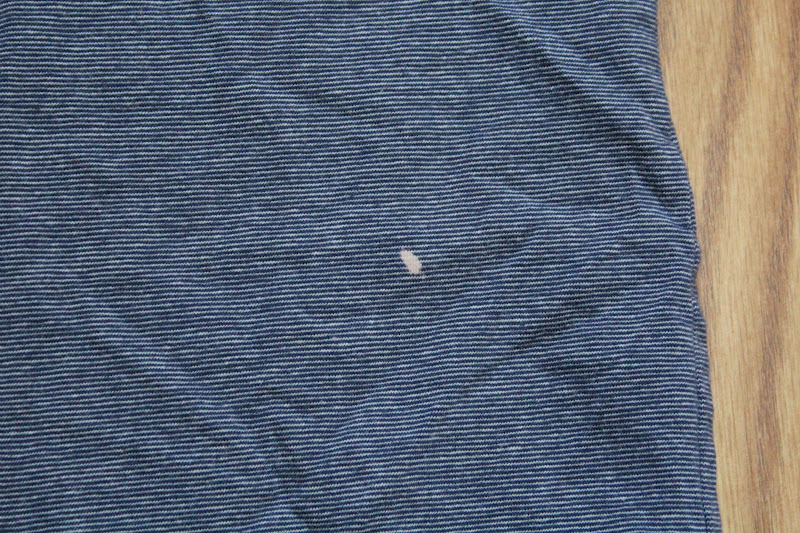
So I was sure disappointed to get a bleach stain on one of my 
favorite pieces... 
 Well, a lil bit of time at my sewing machine, and its good to go!

Here is how I did it...
I used my skirt (of course),
pins,
fabric scissors,
fabric marker,
a scrap of stretchy cotton,
sewing machine,
walking foot,
and thread.

(If you don't have a walking foot, you'll want to 
use a fabric stabilizer behind the applique!) 

First, I found an image on Google Images that I liked,
and then sketched the image onto the cotton using my fabric marker.
Then, I cut the shape out and pinned it onto my skirt 
in a place that would cover the stain.

 Using my walking foot, I sewed the applique onto the skirt,
slowly and carefully, making sure not to sew the back of
the skirt to the front!
 This is from the back...
I guess I didn't quite center it over the stain, oops!
 But, lucky for me, you can't tell from the front! :)
Once you are done sewing, it might look kinda junky.
Don't worry! Just carefully trim any wonky pieces, 
throw it through the wash to get rid of the ink,
 and there you are! :) No more bleach stain! 
 If you use fabric stabilizer, I'm sure it will turn out better than
mine did, but when you organize your craft room, its sometimes
hard to find things that you  tucked away! ;)
Anyone else have that problem?!
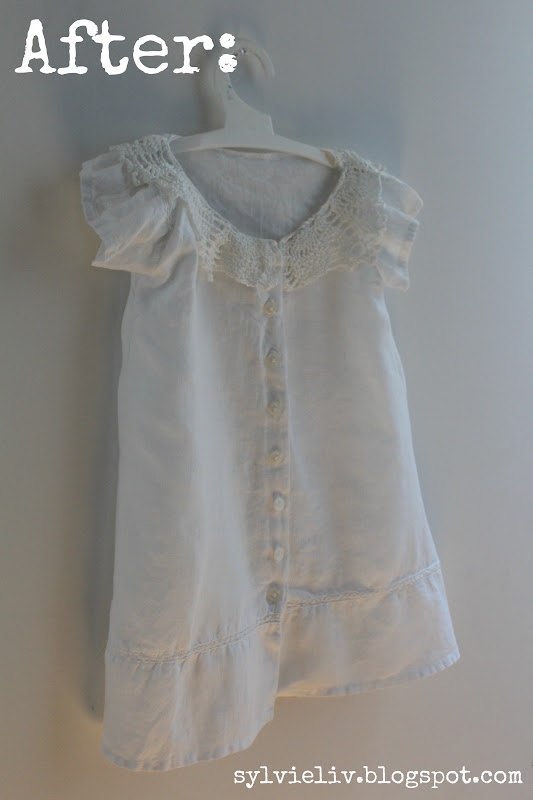
Anyways, I like my "new" skirt! I might have to dig in the kid's
dressers for more stained clothes to fix up! 

Thursday, June 21, 2012

Fougasse Recipe

I love bread. Especially fresh out of the oven bread.
This is my favorite homemade bread recipe.
It always turns out light and fluffy.
I haven't found anyone yet who doesn't like it.


It is called Fougasse (pronounced: foo- gaas).
It is a soft french bread that goes well with many dinners of soups,
pastas, salads, and much more. I like to use it for dipping in spinach
artichoke dip too! 
Anyways, enough talking, here is how its done!


Fougasse Recipe


Ingredients:
3 3/4 cups White Flour (plus some for kneading on)
2 tsp. Instant Yeast Granules
2 tsp. Sea Salt
1 1/2 cups Warm Water


Cornmeal
Olive Oil
Basil Pesto (optional)
Sea Salt
Fresh Grated Parmesan-Reggiano (optional)


Directions:
Put 3 3/4 cups flour into your mixer bowl. Add 2 tsp. yeast and
rub/mix it together using your hands.  Add 2 tsp of salt and 1 1/2 
cups warm water and mix on low 2 minutes- using the bread hook.
Then mix on high for 6 minutes.
Turn dough out of bowl and knead gently.
Replace in bowl, cover, and let dough rise 1 hour.


Preheat oven to 500 degrees.
Grease cookie sheet and dust with cornmeal.
Release dough from bowl to cookie sheet, and cover with cornmeal.
Let dough rest 5 minutes.
Shape into Fougasse triangle shape (shown below), 
                                               and cut 3 slits using sharp knife.
Brush loaf with olive oil.
Smear loaf with pesto.
Sprinkle salt and Parmesan-Reggiano over top.


Place bread on cookie sheet into preheated oven.
Mist the oven and bread with water in a spray bottle.
Reduce oven temp to 450 degrees.
Bake 10-12 minutes.
Remove and let cool.
Serve soon after or store in an airtight container for up to 3 days.


This bread also freezes well! Simply bake it for only 6-7 minutes,
cool it, wrap it in an airtight container or bag, and freeze.
When you are ready to enjoy it, remove from freezer and bake 
for 12 minutes at 450 degrees. 


Enjoy! :)


Wednesday, June 20, 2012

Super Soft Sugar Cookies


I love Lofthouse Sugar Cookies.
Is there anyone who doesn't? :)
I love how soft and chewy they are.
I love that they have a heap of frosting on top.

Want to make soft and chewy sugar cookies at home?
Want to make your own Lofthouse Sugar Cookies?

Here is my recipe... I got the recipe from my Mom.
(Where she got it, I don't know.)


Soft & Chewy Sugar Cookie Recipe

Ingredients:
            2 eggs
            2/3 cup Vegetable Oil
            1 tsp. Vanilla
            3/4 cup White Sugar, plus more for dipping
            2 cups White Flour
            2 tsp. Baking Powder
            1/2 tsp. Salt
            One Jar Vanilla Frosting (or this recipe is my fave!)

Directions:
Preheat oven to 375 degrees. In your mixer, combine eggs,
oil, and vanilla.  Add sugar and mix until thick.  Blend in dry 
ingredients. Drop in small balls onto cookie sheet (I like to use my 
cookie scooper). Using a drinking glass with a flat bottom, lightly 
touch a dough ball to get the bottom of the cup to make it greasy, 
dip the cup in sugar, and press the bottom onto the dough to flatten 
the cookie. Bake 8 minutes. Remove cookies from cookie sheet within a couple minutes after coming out of the oven, and place on parchment paper of a cooling rack to cool.


My favorite frosting recipe to use is this recipe from Martha.

I used Wilton 2D Tip to frost them once they cooled. 
To get the rose effect, just spiral the tip around starting in the center
while squeezing the bag lightly. You can watch a lil how-to I
found here if you'd like! :)

We had some in our lil picnic last week! :)


Enjoy! 

-Sylv

Tuesday, June 19, 2012

Girls Upcycled Linen Dress

Here is another little dress I made from an old shirt.
I love upcycling old clothes, because you don't have to hem the
 edges- it is already done for you!
I made this dress the same way I usually do,
using  this tutorial that I posted last March.

I simply use an old dress as a pattern...
cut it to size, and sew it back together.
This shirt had buttons and no stretch,
so I used another dress that was the same.
 The only thing I did differently this time 
than I did with previous dresses, was sew a 
piece of doily trim around the neckline just for fun.

I sure am pleased with how it turned out! 

Now go dig in your closet, and whip one out for the girl in your life! 

:) Have a nice day! 

Monday, June 18, 2012

BonBons Recipe

Well sorta a recipe...
More like instructions, because you don't really need a recipe.

They're that easy!

These are like the cake pops they sell at Starbucks...
Only I like them perfectly fine w/out the stick. :)


Bon bons

Ingredients:
           1 Box Cake Mix 
           1 Jar Frosting
           1 Bag Chocolate Chips
           1 Tbsp Shortening

You can use whatever flavor cake and frosting that you like. I like to use super moist vanilla cake w/ vanilla frosting. You also can use whatever kind of chocolate chips you like. I prefer dark chocolate.

Directions:
         Bake the cake according to directions on box.
         Remove cake from oven and let cool 5 min.
         Turn cake out into large bowl
         Dump your jar of frosting over cake
         Mix w/ hand mixer on med speed until thoroughly blended
         Using a cookie scooper or melon baller, scoop dough out onto 
                    a parchment lined cookie sheet
         Freeze for 1/2 an hour
  
Optional: 
          Remove from freezer and roll into round balls w/ your hands.

Dipping:
         Put a few inches of water in a small pot and simmer the water
         Place an oven safe bowl over the pot (Leaving over low heat)
         Pour chocolate and shortening into the bowl
         Stir until chocolate is melted
         Dip bon bons into chocolate (I like to use 2 forks)
         Place on wax paper to harden
         Top with sprinkles if you'd like

 Enjoy!
We had bon bons in our lil picnic last week. :)

Any questions, please ask!

-Sylv

Saturday, June 16, 2012

Cotton & Lace Pom Pom Tutorial


Today I'm sharing how to make the white pom pom
from last weeks picnic...

Supplies:

1-2 yards of Cotton Fabric
Rotary Cutter and Mat 
Fabric Scissors
Styrofoam Ball
Some Lace
Sewing Machine
Optional: Ruffler Foot
Hot Glue and Gun
6" Piece of Ribbon

Cut the fabric into 5" strips on the bias to help prevent fraying.
Now fold the strips the long way like we did in the 
burlap pom pom tutorial and gather along the fold.
Or, if you don't have a ruffle foot,
just use your machine to gather/ ruffle using a long, loose stitch.
If you haven't before, you can learn how to ruffle here.
 Repeat with all of your strips.
 Roll your ruffles in a spiral to make rosettes.
Using hot glue, glue the rosettes onto 
the ball folded/ gathered side down. 

Repeat previous steps with your lace.
If you are using a chunk of lace, first cut it into 
strips like you did with the fabric.
 Continue gluing the rosettes onto the ball until you only have a 
small space of the ball showing. Fold the ribbon in half and glue
it down to the ball, making a loop. Secure with lots of glue.
 Continue to glue on the cotton and lace until all surfaces of the 
ball and the base of the ribbon are covered. Trim off any fabric that 
sticks out too far, to make the ball more round.
 You are finished! :)
Make a few, or make some burlap ones to hang with it!
 These are cute to hang outside, at your wedding, anywhere in
your home, for a party... Wherever! I think mine will end up in 
my pool room. Have fun! 

-Sylvie