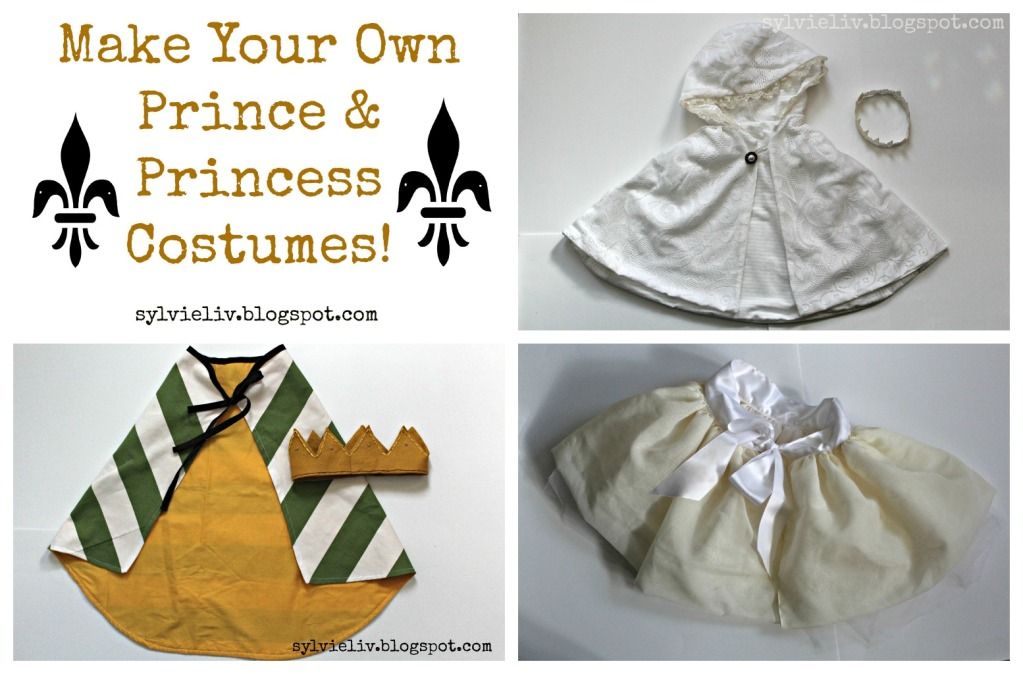
Saturday, October 13, 2012

Reversible Prince Cape Tutorial

Today I'll show you how to make a prince cape! :) 
*I will share details on the princess outfit next week!*

Materials:
(this size is for a preschool aged child)
2 Pieces of Cotton Fabric; about 40"x 34"
60" Coordinating Bias Tape
Sewing Machine; Thread
Fabric Scissors

I haven't figured out how to create downloadable pattern for you guys, so I'll just explain how I came up with my pattern...
Cut two identical pieces using these measurements:
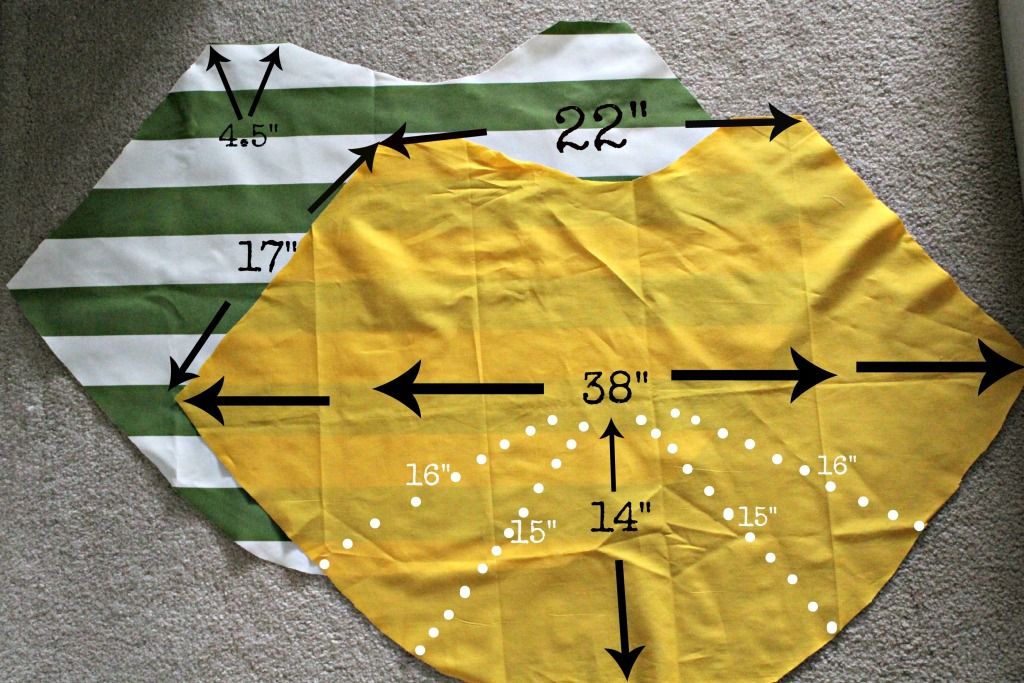
I would suggest drawing it up on your fabric using a fabric marker before you cut it.
 Pin the two pieces together, right sides facing.
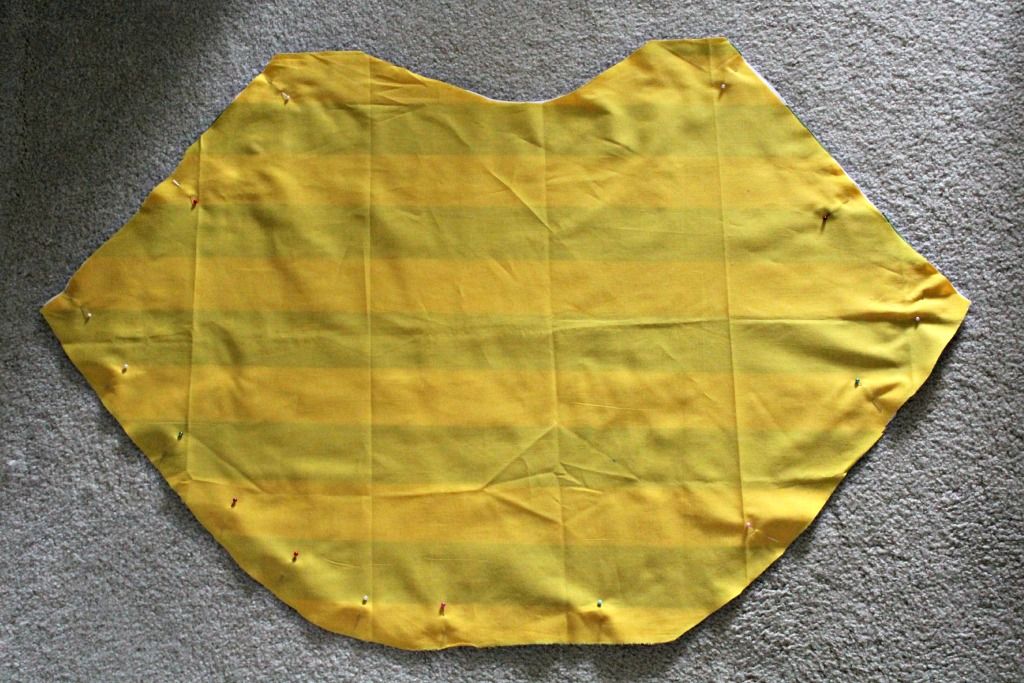
Sew along the edges, using a 1/2" seam allowance. Do not sew the top rounded part. 
Turn cape right side out, press the seams, and do a finishing stitch around the edges. 
This just makes it look nicer!
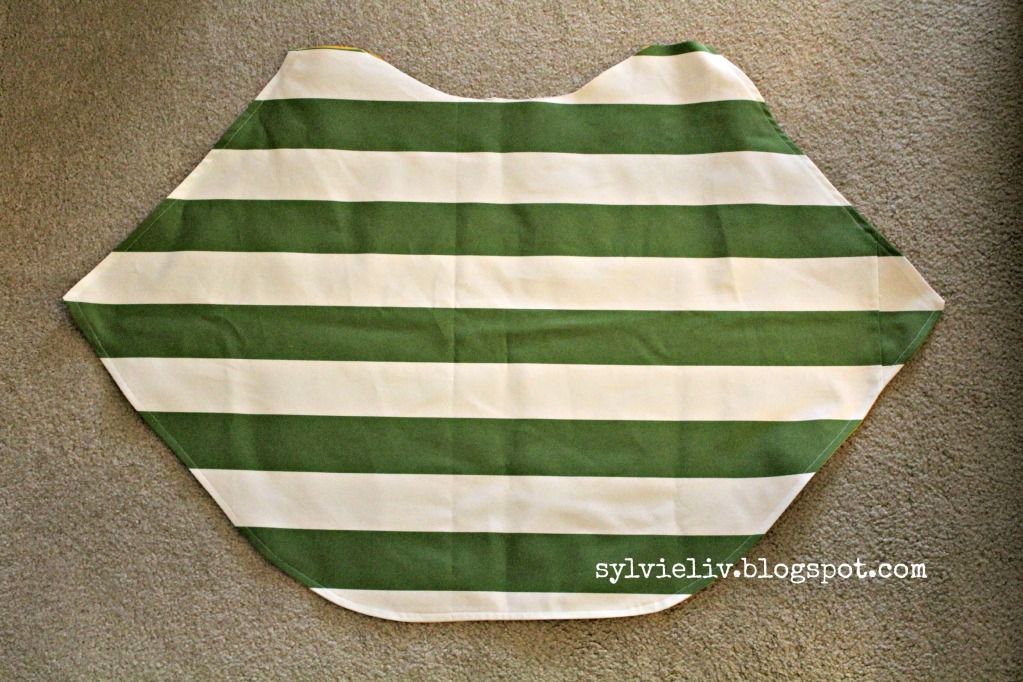
Open your bias tape, pin it to the top/ neckline of the cape, and sew it on. 
*(If you are unsure on how to attach bias tape, there is an excellent tutorial here!)
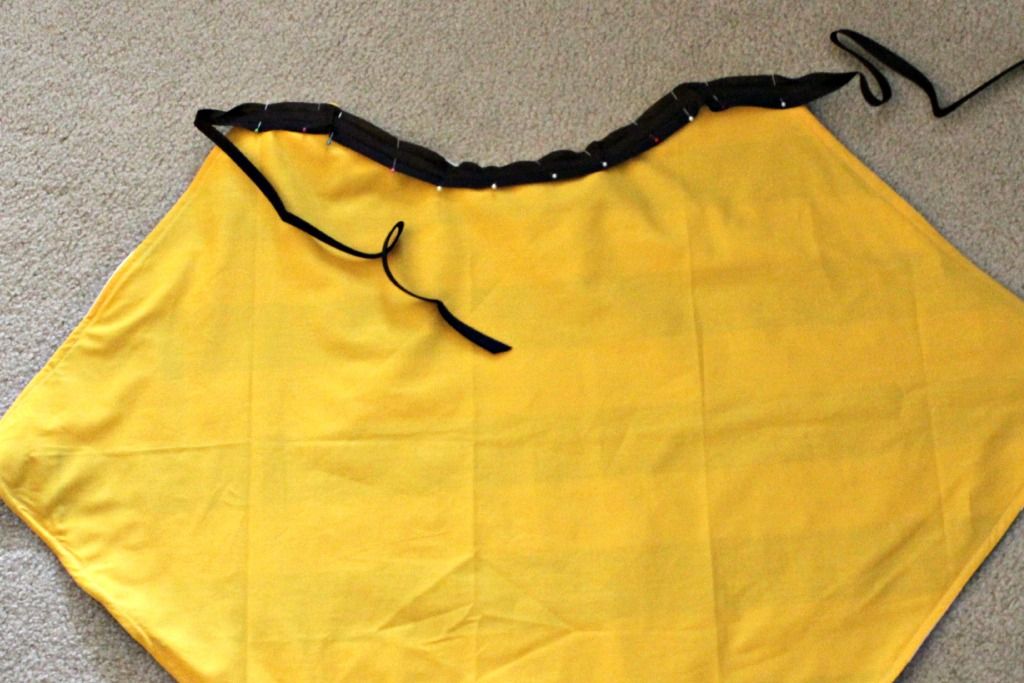
Fold your bias tape over and sew all along the tape, from one end, across the cape, and to the other end. Fold the ends of the tape and sew them in place to avoid fraying. That's it! :)
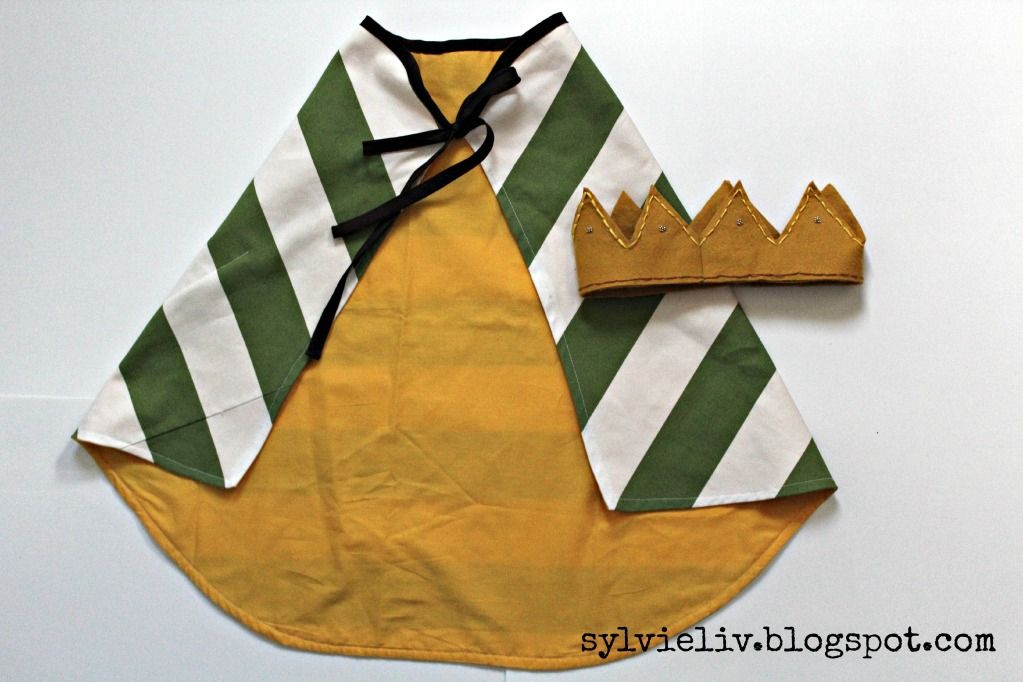
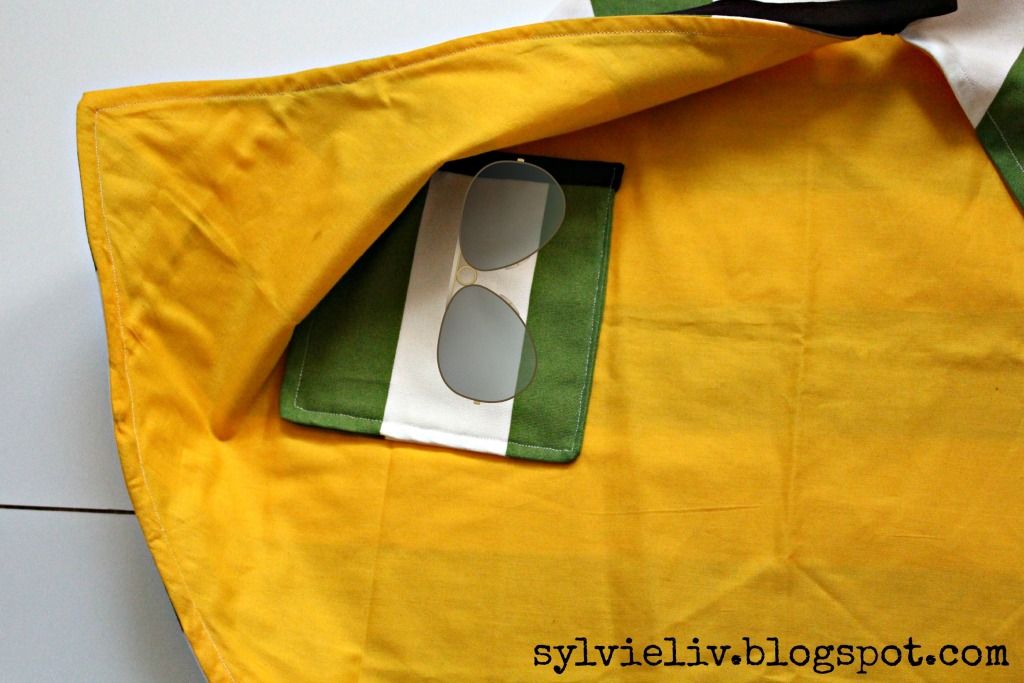
I used some of the scraps to add a little square pocket for stashing treasures!
This was a super easy and quick project, 
and the prince is just as pleased with his cape as he is with his crown! :)
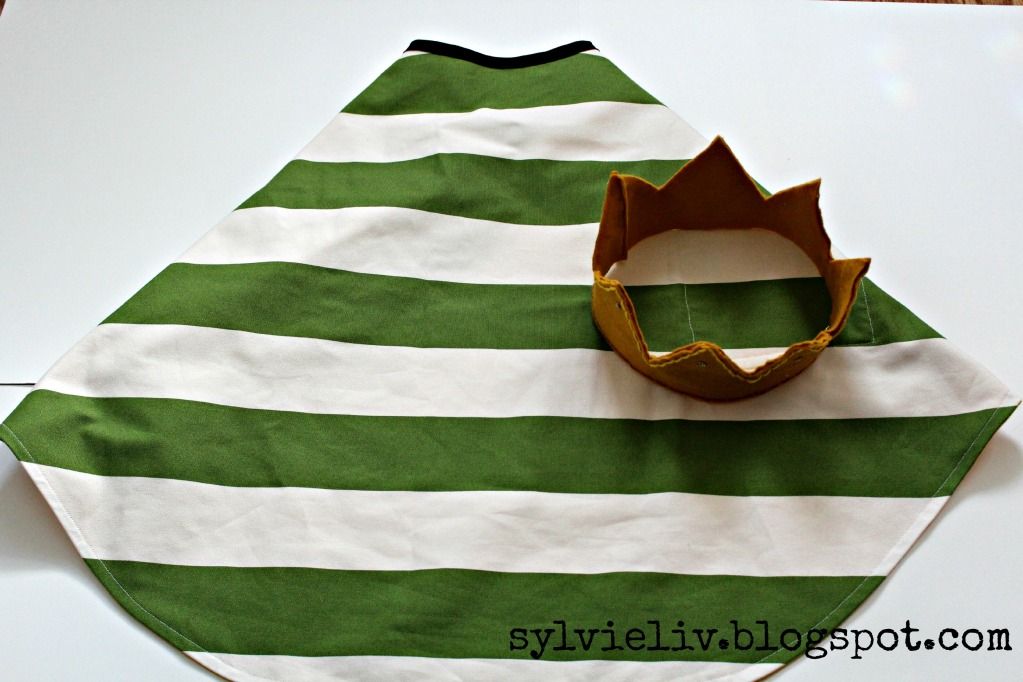
I know I often say that projects I create are simple, easy, or quick but I really don't do a whole lot of projects around here that aren't! :) 

Enjoy your wknd!
-Sylvie


Linked To:

Friday, October 12, 2012

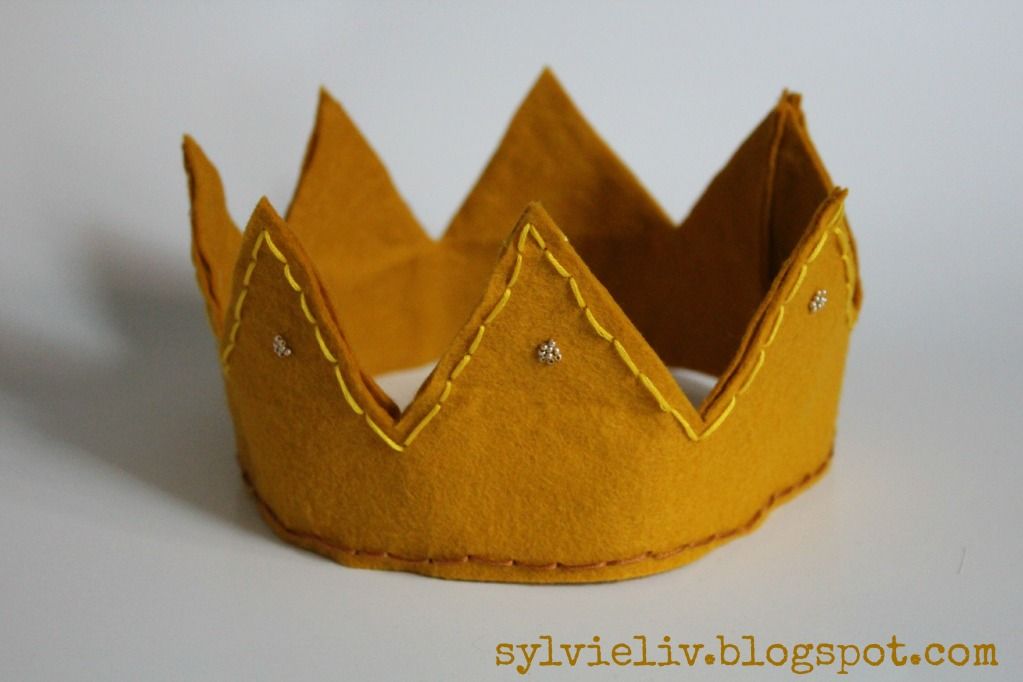
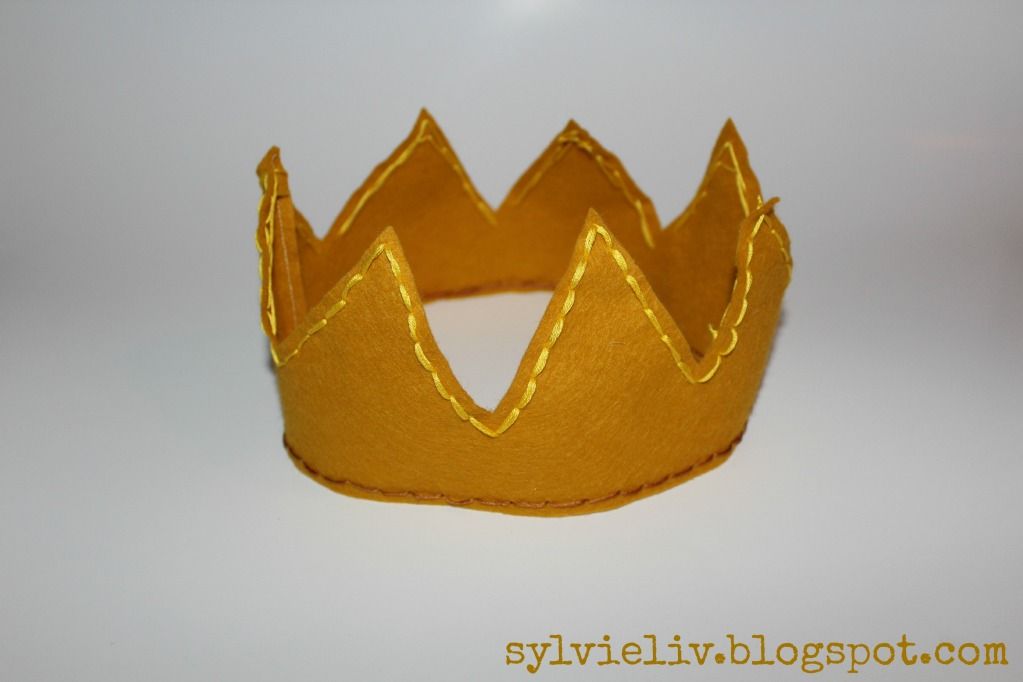
Cute Prince Crown Tutorial

Here is a fun Halloween or Dress Up project for ya! :)
The crowns that you find in the stores are so tacky and overpriced!
This crown is a super simple and cheap project, 
and it is much cuter than the plastic or foam ones you find in the store! 

Materials:
Two 22"x4" pieces of wool felt
Fabric Scissors
Embroidery Floss & Needle
Small Beads, Small Needle, & Thread
Sewing Machine/ Thread

Instructions: 
(This crown fits a preschool age child; 
adjust the measurements of the crown to fit your child how you like it to fit)

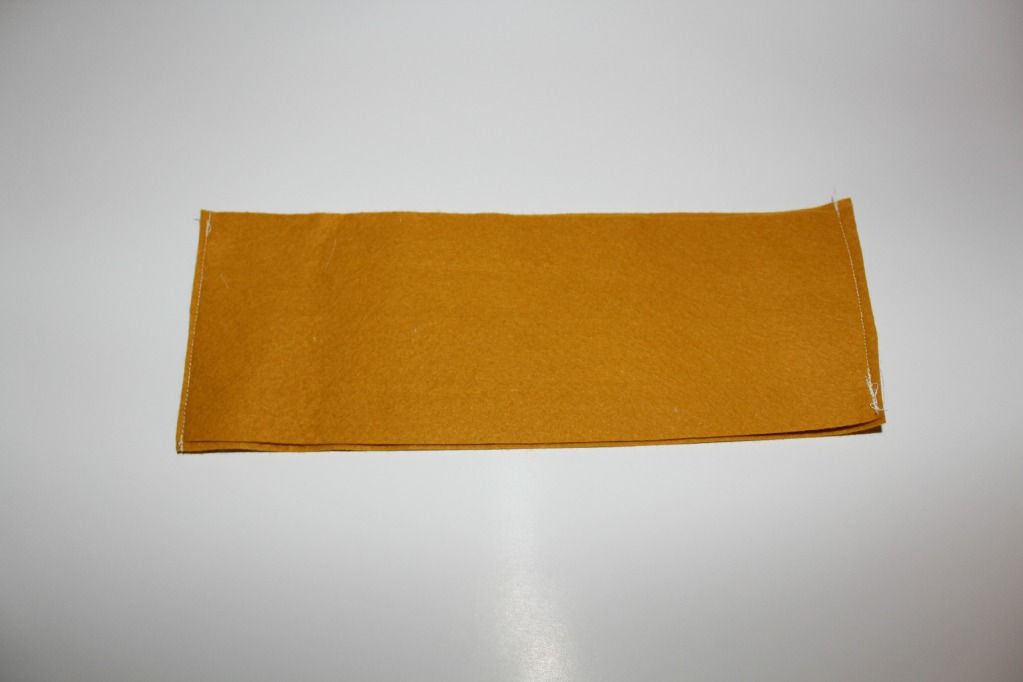
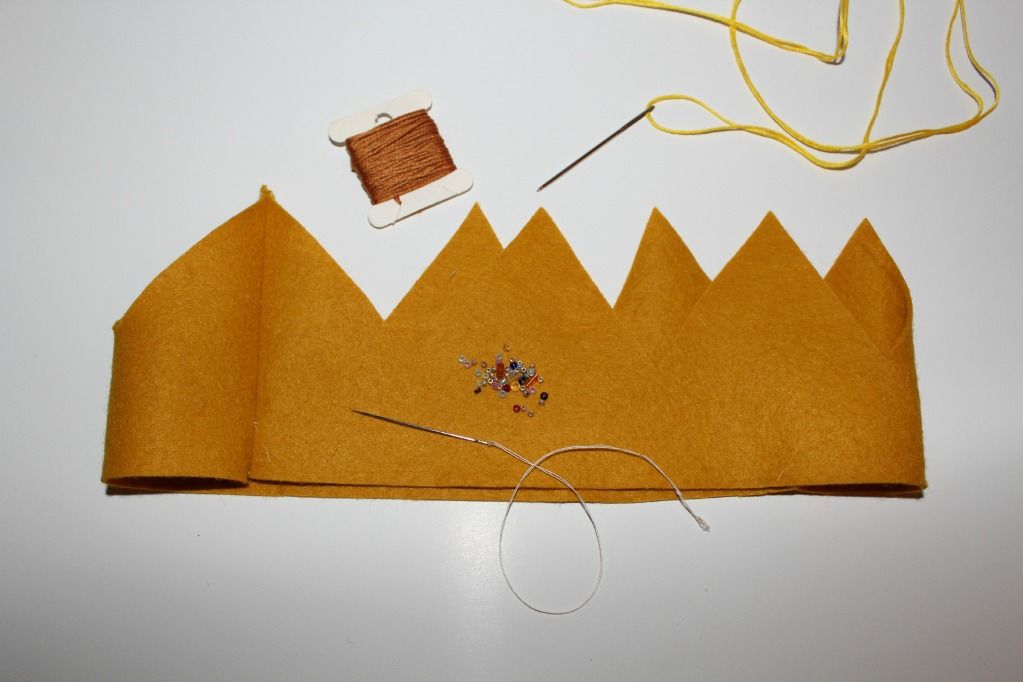
Sew the short ends of the felt together. I had two 11" pieces, 
so I sewed both ends together to make a crown size.   
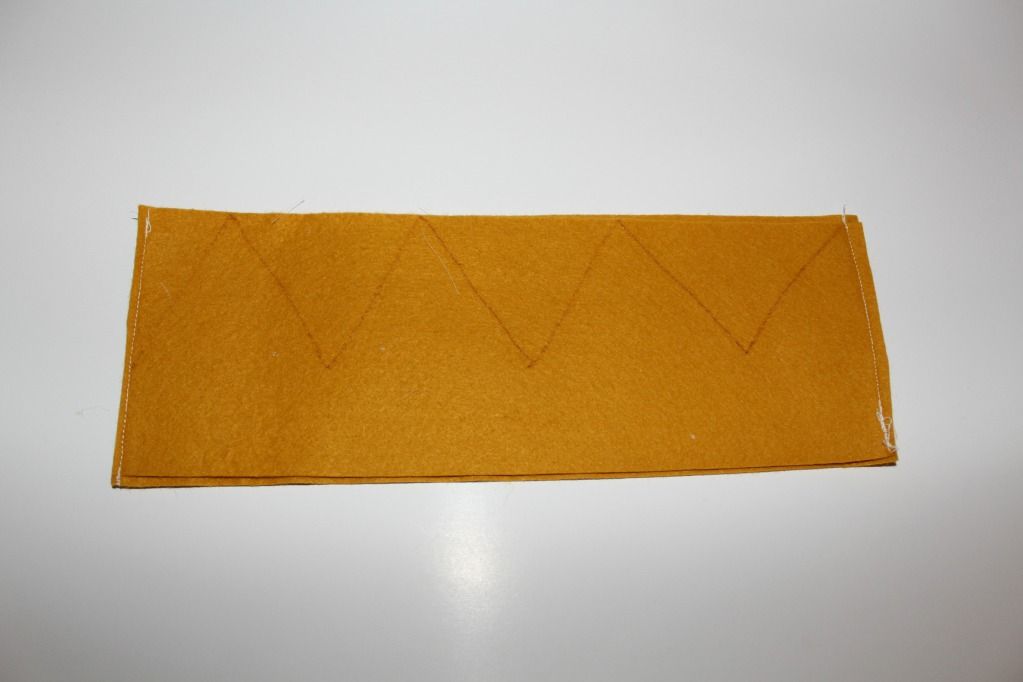
Draw crown points into your felt like this:
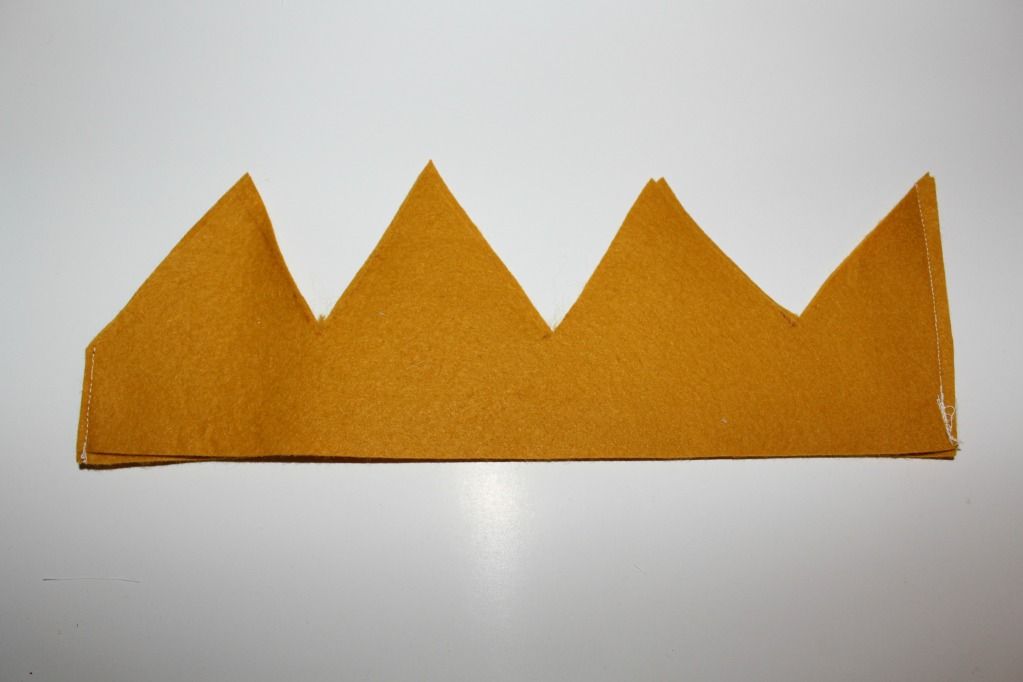
Cut along the lines...
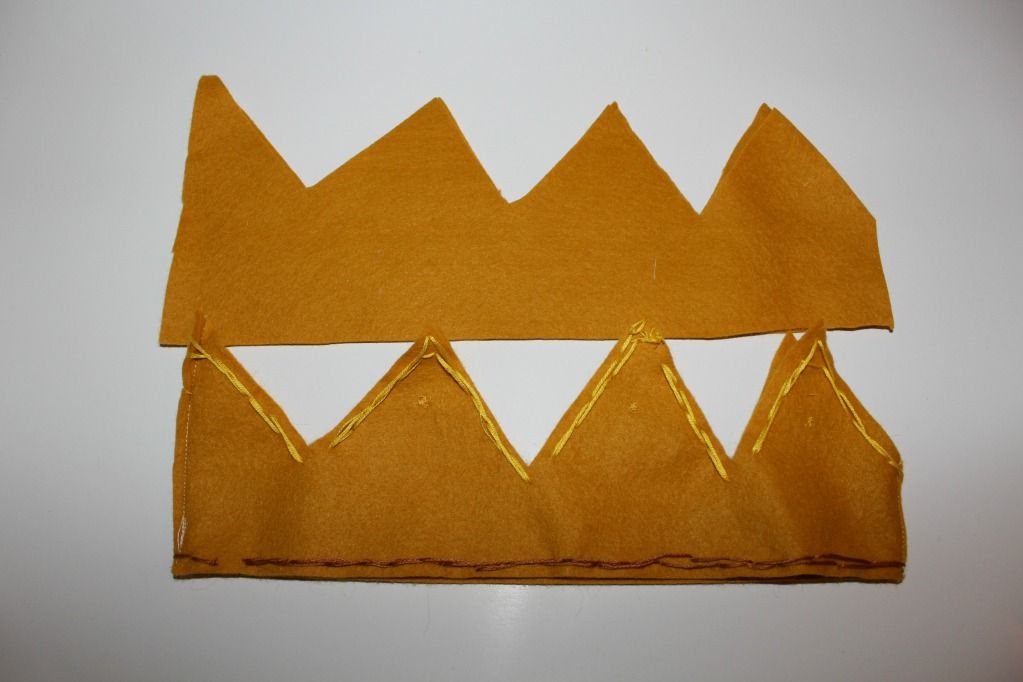
Repeat steps to make another crown slightly larger to use as a lining.
Now turn your crown right side out, and start stitching and beading!
I stitched around all the edges using the same stitch I explained here. 
(Anyone know what this stitch is called?)
You can add beads wherever you want to add more detail.
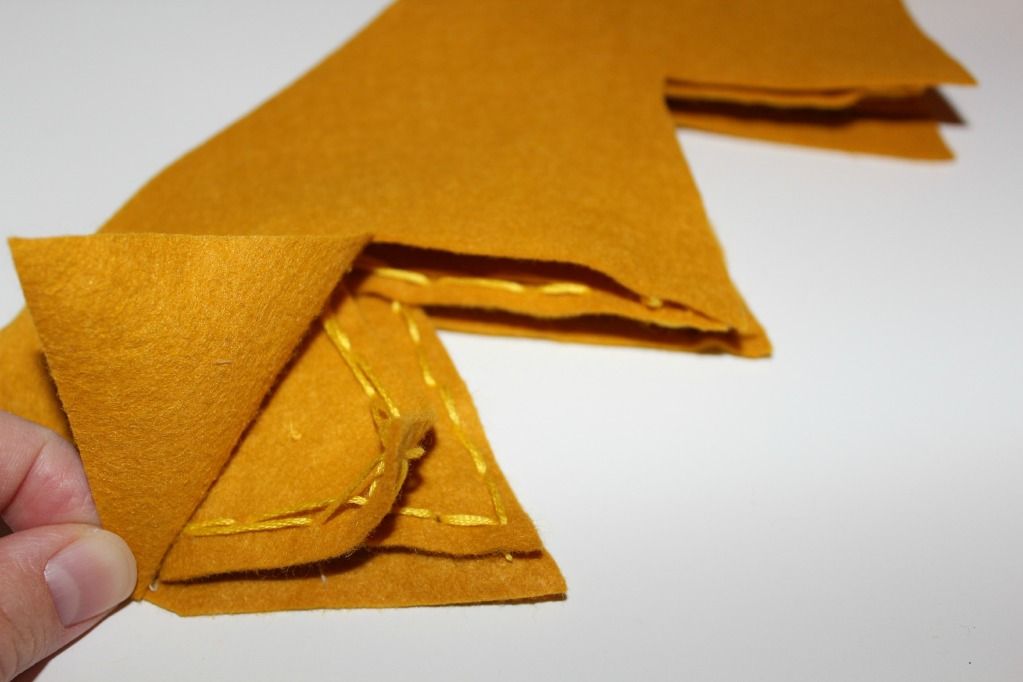
Next turn your crown right side in, and layer your second crown around it. 
Glue in between the layers, gluing the backside of the stitches to the second layer.  
Turn the crown right side out, trim the seams to match, and you are done!
The little boy who got to claim this crown 
is quite pleased with it and has been wearing it all around! :)

I will be posting a tutorial to make a prince cape soon!

Have fun! 
-Sylvie

Thursday, October 11, 2012

There Is A Buck In My Living Room

Does your husband have a mount that he would like to hang in the living room? Is your living room not one bit hunting camp/ lodge style? You can make it work! :)
Ok, I'll be honest... I actually asked Mr. Liv to move the buck from above the stairs into the living room. I like it! :) That was another moment he looked at me like I'd lost my mind (like when I told him I do like hearts)! 
 I picked up an empty frame for cheap at a garage sale, taped off the linen part, and spray painted it semi- gloss white. I think the pretty frame around it makes it not feel so hunter-ish. I love the contrast between the feminine frame and flowers and the masculine buck.

Here is another mount I love from White Faux Taxidermy...
  White Moose Head w/White Antlers - Faux Taxidermy - Chic & Trendy

Thanks for reading! :)
-Sylvie


Tuesday, October 9, 2012

Dye Your Pants Mint Green!

Remember the regular pants turned maternity tutorial I showed you last week? Well, they aren't cream anymore! :)

It was super easy and fast project!
You will need: A bucket, 1 gallon steaming hot water, 1/4 cup salt, 1 pkg Tulip fabric dye in Green, 1 pkg Tulip fabric dye in Turquoise, and your pants. 
 Here is what I did: First, I filled the bucket with 1 gallon of super hot water and added the salt, 1/2 pkg of Green dye, and 1/2 pkg of Turquoise dye. Then I mixed the solution to dissolve the dye and salt. Next, I soaked my pants in hot water, and submerged them in the water. I mixed the pants in the water for about 5 min.  
Then, I made sure the pants were submerged, and let them sit for 2 1/2 hours. Remove them from the bucket, and run them through your washing machine on a cold water cycle with minimal soap.
Dry according to tag on pants, and you are finished! :)
This is such a simple way to make yourself a "new" pair of pants for very cheap!

Have fun! :)
Sylvie

Linked To:


Monday, October 8, 2012

Sunday Morning Brunch Waffle Recipe

Fresh waffles, freshly whipped cream, fresh homemade butter, raspberries from Grandma's garden, and pure maple syrup from Mom and Dad's woods. 
 What could be better?!
 Can we call it brunch?
 Or is it just plain dessert?!


I found this recipe here, and it is such a good one! 
They are light, airy, and flavorful...

The Greatest Waffle Recipe Ever...

Ingredients:
1 3/4 cups all-purpose flour
1 teaspoon baking powder
1/4 teaspoon salt
2 egg yolks
1 3/4 cups milk
1/2 cup canola oil
2 egg whites

Directions:
In a medium mixing bowl stir together flour, baking powder, and salt. Make a well in the center.
In another bowl beat egg yolks slightly. Stir in milk and oil.
Add egg yolk mixture all at once to the dry mixture. Stir just till moistened (should be lumpy).
In a small bowl beat egg whites until stiff peaks form (tips stand straight up).
Gently fold egg whites into flour and egg yolk mixture, leaving a few fluffs of egg white, Do not overmix.
Spoon waffle batter into your waffle iron, making sure not to overfill it.
Serve with real maple syrup and unsalted butter.


Enjoy!
Have a good week!
-Sylv

Friday, October 5, 2012

Regular Pants To Maternity Pants Tutorial

It is super easy to turn your regular pants into maternity pants that will fit you throughout your pregnancy, and right after delivery!

Here is what you will need:
Pants that fit you pre-pregnancy
Fabric Scissors
Sewing machine with denim needle and coordinating thread
Straight Pins
Stretchy cotton knit (I used the front of an old tank top)

First, cut the front of the pants off. Start just below the pocket openings, and cut under the zipper.
 Using the panel that you cut off, fold your knit in half, and cut it the same height as your cut panel, and 1-2 inches narrower on the sides.
The fold should be along the top of the waist of the pants piece.
 Next, pin the knit to the pants (right sides facing), along the bottom of the cut edge.
 Using a strong stitch, sew along the pins (or use a straight and then a zigzag stitch).
 Now pin the sides of the panel to the sides of the pants (right sides together), and sew. They will not lay flat once pinned like this, that is ok.
 Trim and press your seams, and you are done! :)
No, I did not press my seams before this pic, just pretend! ;)

-Sylvie :)

Wednesday, October 3, 2012

Attention Michigan Readers!

My cousin and friend is going to school to be a school teacher
 at Oakland University in Rochester, MI.
Like most college students,
 she is struggling to make ends meet to make her way through college.
Yesterday her car caught fire and completely burned.

The link to this video is here.

This was her only car to get her to work, school, and back home.

She needs help to find an affordable, reliable car. 
If you know of anyone getting rid of a good, used car, please let me know! 
You can email me at sylvieliv(at) yahoo(dot)com.

Thank you for your help!
-Sylvie

Tuesday, October 2, 2012

Craft Show Inspiration

Last weekend I went to a fun Michigan Craft Show...
There were so many neat items and many many impressive artists!
Here are a few pics I snapped while I was shopping...
I love finding inspiration in vintage items and in other artists work!


Have a good day! :)
-Sylv

Monday, October 1, 2012

Twine Wrapped Vase Tutorial... Fall Decor DIY

I love to give twine wrapped vases as gifts in the fall...
They are super easy to make, and don't cost much at all!

You will need:
Old Vase
Hot Glue & Gun
Scissors
 Starting at the bottom edge, squeeze some glue onto the vase,
and press the twine onto it. Leave the bottom of the vase untouched. 
Continue around the vase: add a little glue, press on the twine... 
If you want to alternate colors, simply cut the twine, glue it into place, 
and start gluing the next color where you left off! It is that easy! :) 
When you get to the top, 
wrap the twine down into the vase slightly, cut, and glue the end inside the top.
That's it! Stuff some branches in there, and away you go! :)
I like to add paper or felt flowers to the branches, and a matching tag to the deal. 
I will post tutorials on both of those things soon! :)

Happy Fall! :)

-Sylvie